Time & Attendance Support Center
Mobile
ADP Mobile Solutions App
Registering for Employee Access with ADP Mobile Solutions App
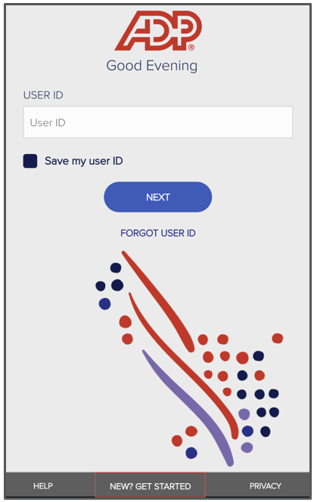
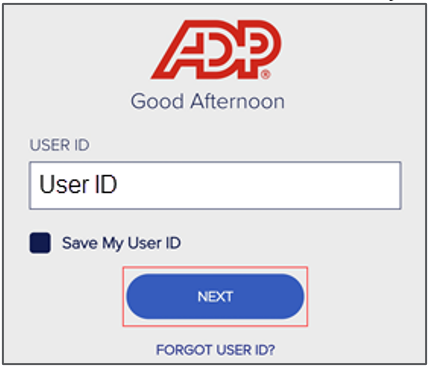
1. Open ADP Mobile Solutions App.
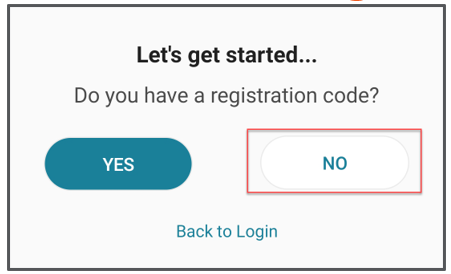
2. From the Log on Page, click on New? Get Started.

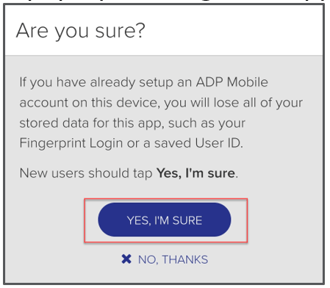
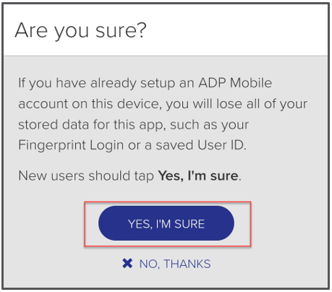
3. A pop-up message will appear, click Yes, I’m Sure.
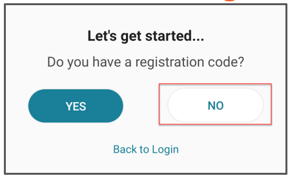
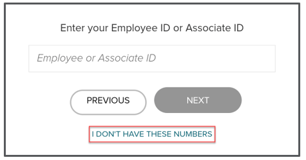
Don’t have a Registration Code? Select No.
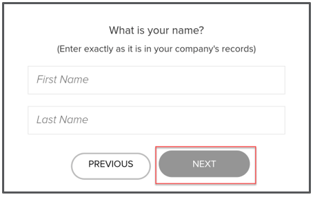
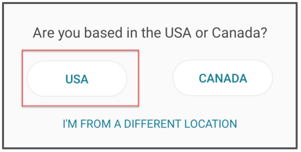
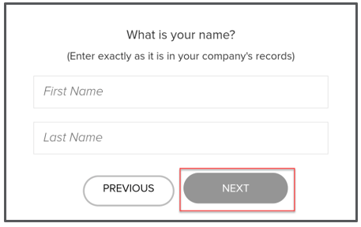
2. Enter your First and Last name, click

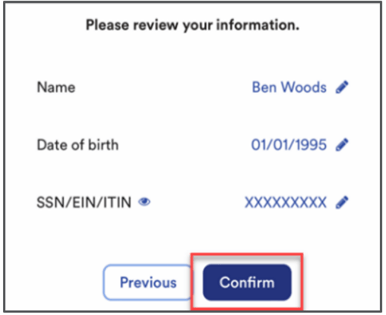
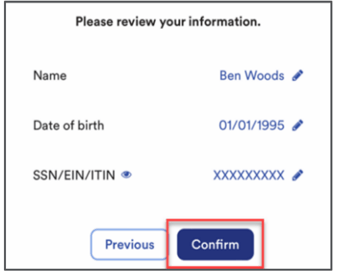
6. Review your information, click Confirm.
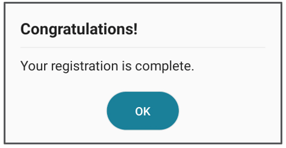
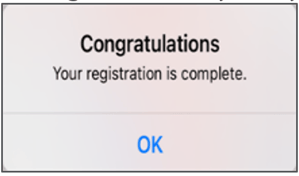
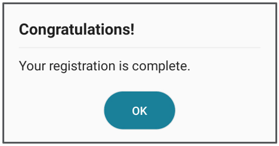
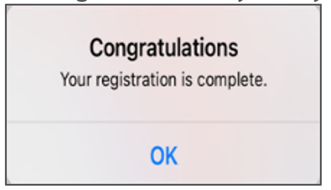
7. Message will identify that your Registration has been completed, click OK.
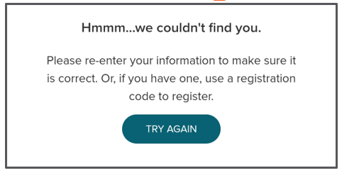
Common Registration Issue Message
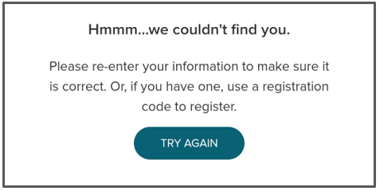
Please reach out to your HR Administrator to verify that your Name, Social Security number, and Date of Birth are entered correctly in the payroll and/or time system.
1. Open ADP Mobile Solutions App.
2. From the Log on Page, click on New? Get Started.
3. A pop-up message will appear, click Yes, I’m Sure.
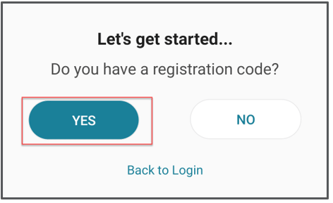
4. Have a Registration Code? Click Yes. Review your email from SecurityServices_NoReply@adp.com.

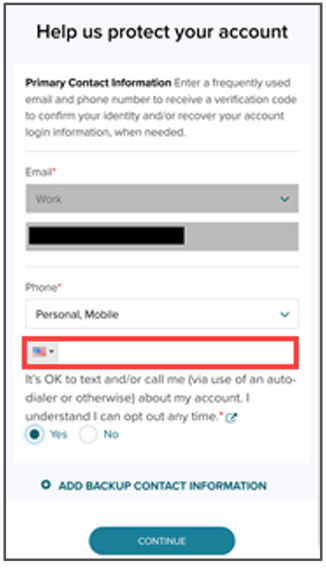
5. Enter your mobile number, click continue. Note: Email is automatically filled in based on email provided by HR Administrator.
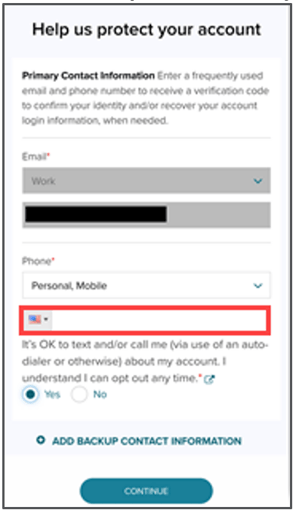
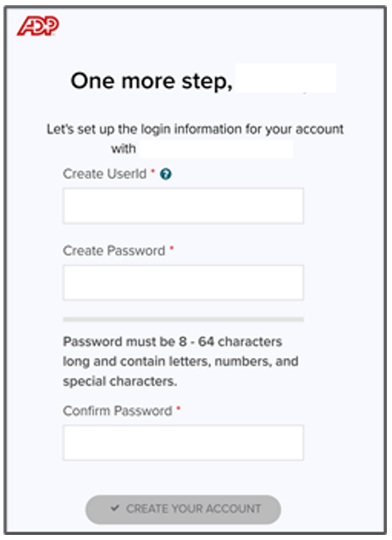
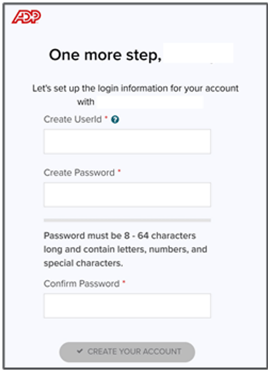
6. Create a Unique UserId, Password, and Confirm Password, Click Create Your Account.
Don’t have a Registration Code? Select No.
1. Open ADP Mobile Solutions App.
2. From the Log on Page, click on New? Get Started.
3. A pop-up message will appear, click Yes, I’m Sure.
4. Have a Registration Code? Click Yes. Review your email from SecurityServices_NoReply@adp.com.
5. Enter your mobile number, click continue. Note: Email is automatically filled in based on email provided by HR Administrator.
6. Create a Unique UserId, Password, and Confirm Password, Click Create Your Account.
Don’t have a Registration Code? Select No.
7. Message will identify that your Registration has been completed, click OK.
Common Registration Issue Message
Please reach out to your HR Administrator to verify that your Name, Social Security number, and Date of Birth are entered correctly in the payroll and/or time system.
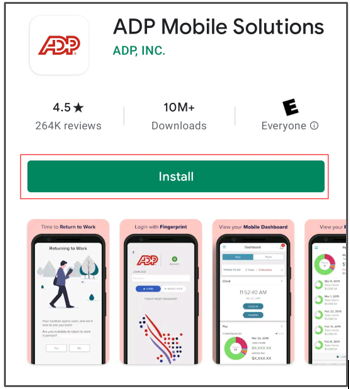
Installing the ADP Mobile Solutions App
1. Search for ADP in your mobile devices’ app store, choose ADP Mobile Solutions.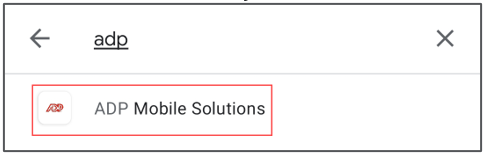
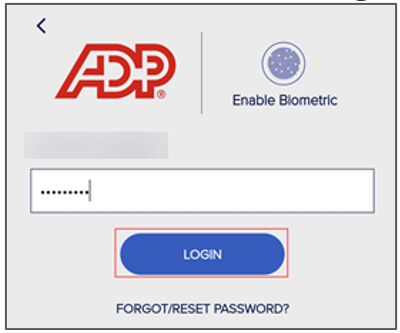
- Alternatively, biometric sign on can be initiated on this screen.
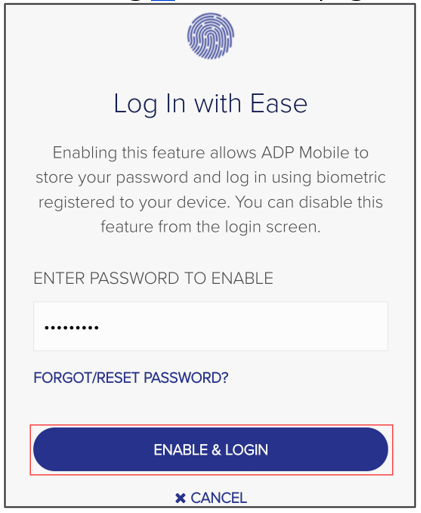
To enable biometric sign on:
1. Select Enable Biometric.
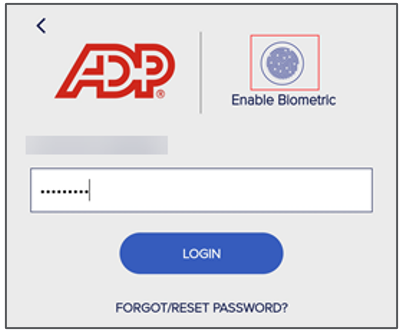
2. On the Log In with Ease page enter Password, select Enable & Login.
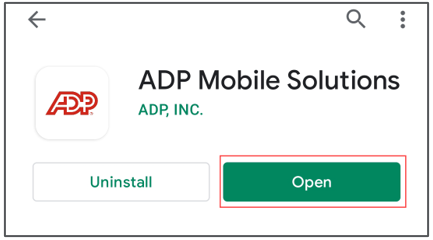
You have successfully installed the ADP Mobile Solutions app.
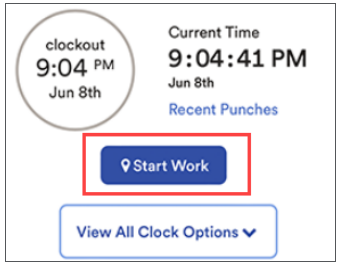
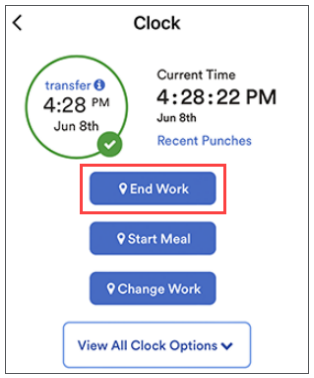
Start and End Work with Mobile App
1. Log onto the ADP Mobile Solutions App.
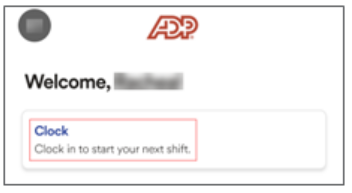
3. Tap on the Start Work icon.
Punching Out for Meal Break
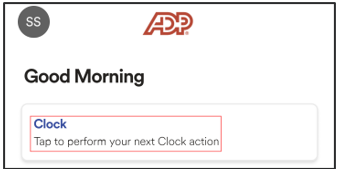
1. From the Mobile Dashboard, Tap on Clock, and Select the Start Meal icon.
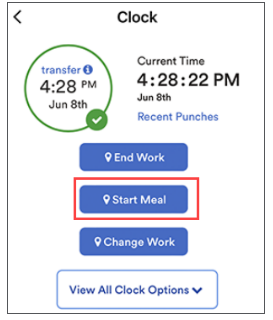
2. For employee to return from their meal, Tap on Clock, and Select the Start Work icon.

Transferring Departments
1. From the Mobile Dashboard, Tap on Clock, and the Change Work (Transfer) or View all Clock Options and choose Change Work.
 -OR-
-OR- 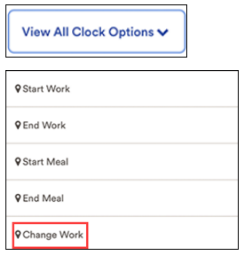
2. From the Change Work Menu, Tap the Expansion Arrow to choose the appropriate Department.
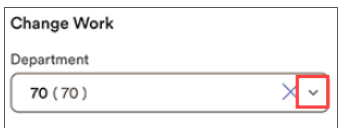
3. Hit Change Work to submit department change.

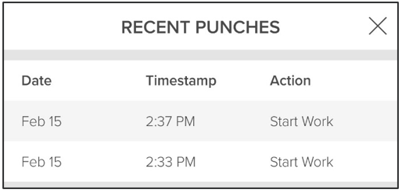
Review Recent Punches
1. From the Mobile Dashboard, Tap on Clock, and Select Recent Punches.
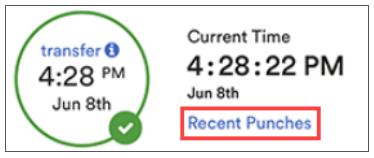
2. From the Recent Punches Screen there is a list of the most recent punches.

-OR-
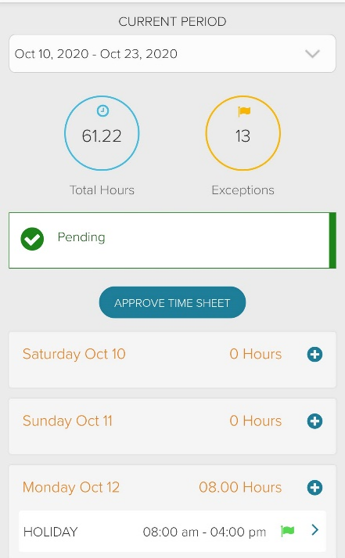
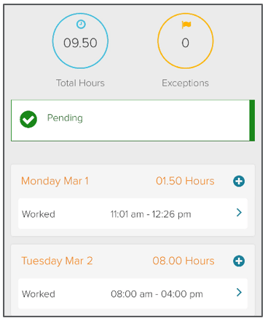
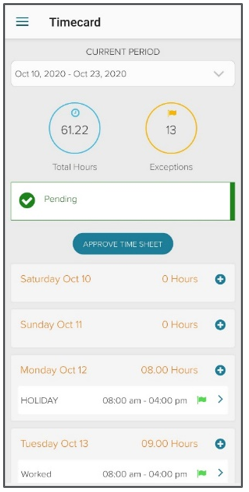
Review Timecard
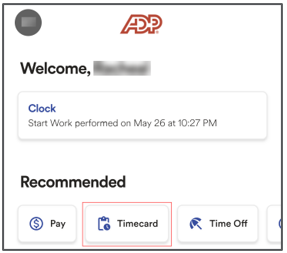
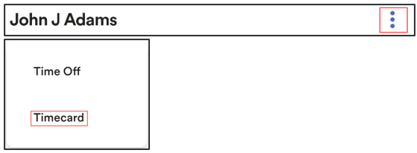
3. From the Mobile Dashboard, Select Timecard under Recommended.Alternatively, Tap on More, and Select Timecard
4. From the Timecard menu the current, and next pay period timecards are accessible for viewing only by default.
Recording In and Out Times
1. Log into the ADP Mobile Solutions App.
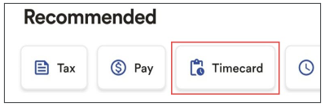
2. Select the Timecard option from the Recommended options.
Alternatively, navigate to More and select Timecard

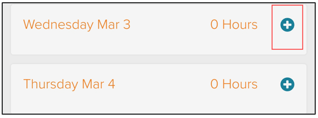
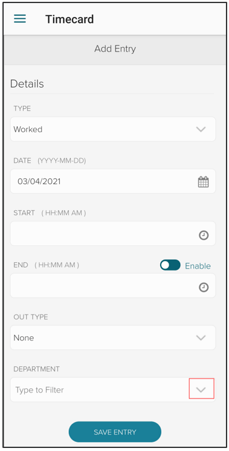
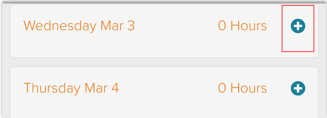
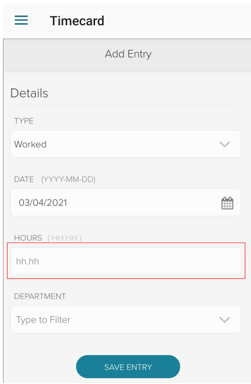
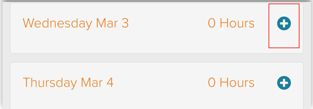
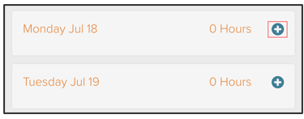
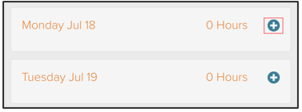
3. To record in and out times to the timecard, select the plus icon on the day worked.
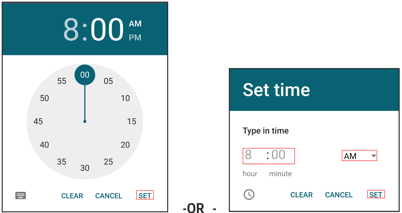
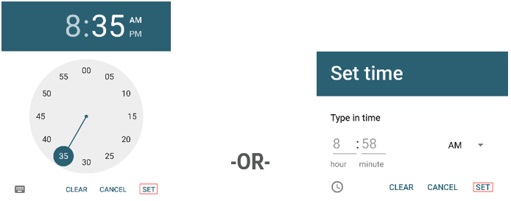
4. On the Add Entry screen, tap the Hours field, enter time using the Clock or pressing the Keyboard icon ![]() in the bottom left-hand corner. Tap SET to save time.
in the bottom left-hand corner. Tap SET to save time.
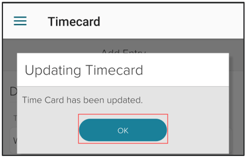
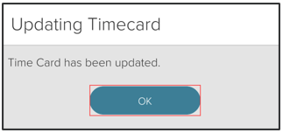
6. On the Updating Timecard pop-up, Tap OK to save entry.
Transferring Departments
1. From the Add Entry screen, expand the drop-down box for the Department field.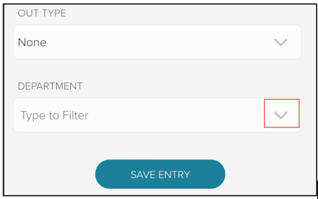
2. From the Transfer drop-down menu, Tap the Department associated with your time.

3. Hit Save Entry to submit department.
Review Timecard
1. Select the Timecard option from the Recommended options.Alternatively, navigate to More and select Timecard

2.From the Timecard menu the previous, current, and next pay period timecards are accessible for viewing only by default.
Recording Total Hours with the ADP Mobile Solutions App
1. Log into the ADP Mobile Solutions App.
2. Select the Timecard option from the Recommended options.
Alternatively, navigate to More and select Timecard
 -OR-
-OR- 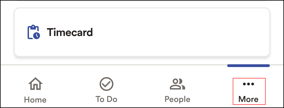
3. To add hours to the timecard, select the plus icon on the day worked.
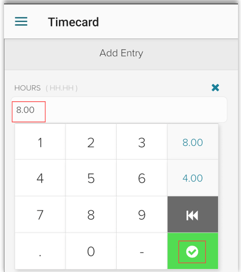
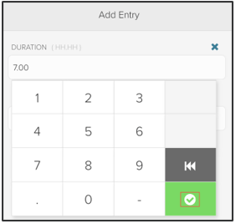
4. On the Add Entry screen, tap the Hours field.
5. Enter total hours as hh.mm, i.e. 8.00. Tap Check to save hours.
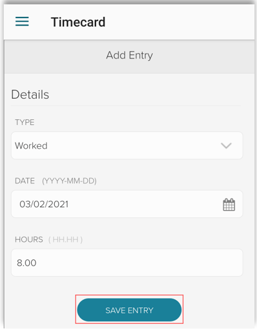
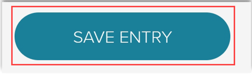
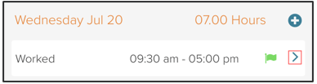
6. Verify Pay Code, Date, Total Hours, and Department, Tap Save Entry.
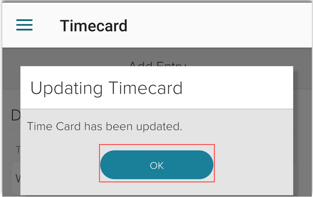
7. On the Updating Timecard pop-up, Tap OK to save entry.
Transferring Departments
1. From the Add Entry screen, expand the drop-down box for the Department field.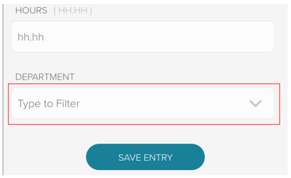
2. From the Transfer drop-down menu, Tap the Department associated with your time.

1. Select the Timecard option from the Recommended options.
-OR-
2. From the Timecard menu the previous, current, and next pay period timecards are accessible for viewing only by default.
Recording Supplemental Pay Codes with the ADP Mobile Solutions App
1. Log into the ADP Mobile Solutions App.
2. Select the Timecard option from the Recommended Options
Alternatively, navigate to More and select Timecard

3. To add a supplemental pay code to the timecard, select the plus icon on the day you wish to record the value.
4. On the Add Entry screen, tap the Expand icon under Type.
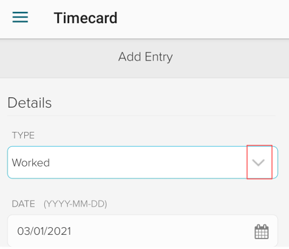
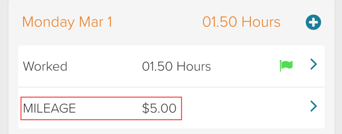
5. Tap Supplemental Pay Code name, i.e. Mileage to record type.

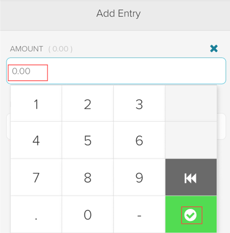
6. Tap Amount field and enter the unit or dollar amount to record. Tap the Green Check to Save amount. If unsure how to enter the value, speak with your supervisor.
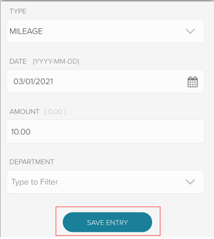
7. Verify Type, Date, and Amount. Click Save Entry to record supplemental pay code.
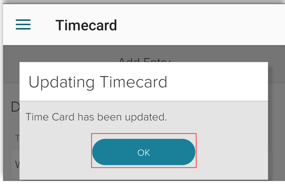
8. On the Updating Timecard pop-up, Tap OK to save entry.
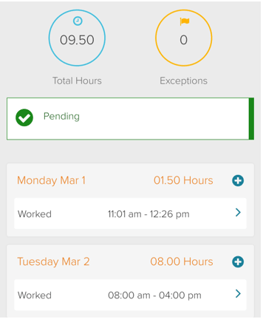
9. Review timecard, value will appear as a dollar amount. Value will vary depending on company rate.
Requesting a Shift Swap
1. Log into the ADP Mobile Solutions App.
2. Select the Schedule option from the Recommended Options
Alternatively, navigate to More and select Schedule


3. Select a shift to swap by tapping the shift.

4. Tap on Request a Shift Swap.

5. On the Shift Swap Request screen, Enter the Date and select Search to find available shifts.


8. Shift Swap Confirmation screen will provide details of your request.

Accepting a Shift Swap
1. Accepting Associate will log into ADP Mobile Solutions App
2. Shift swap requests will appear as a notification in the Mobile App under To Do.

3. Select the Schedule option from the Recommended Options
Alternatively, navigate to More and select Schedule
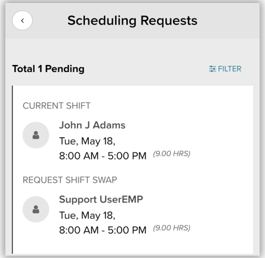
4. On the schedule page a Scheduling Requests task will appear, tap the arrow button to open.

5. On the Scheduling Requests page > tap the arrow button to open any pending requests.

6. Tap the Accept button to swap shifts.
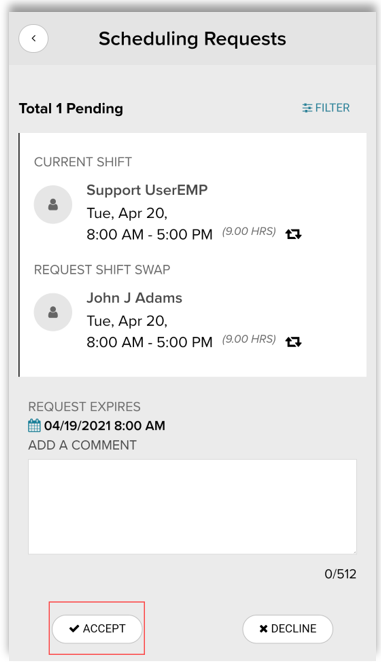
7. On the page that states “Are you sure you want to perform this action?”, tap Yes.
8. A supervisor will still need to approve the shift swap prior to schedules changing. Reach out to your supervisor if you have any questions.
Review Recent Punches
1. Log onto the ADP Mobile Solutions App.2. From the ADP Mobile Dashboard, tap Clock.
3. From the Clocking Page, Tap Recent Punches.
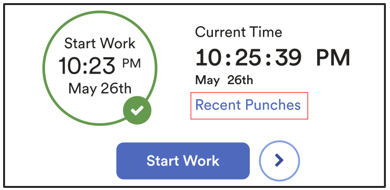
4. From the Recent Punches Screen there is a list of the most recent punches.
Review Timecard
1. From the Mobile Dashboard, Select Timecard under Recommended.Alternatively, Tap on More, and Select Timecard.
 -OR-
-OR- 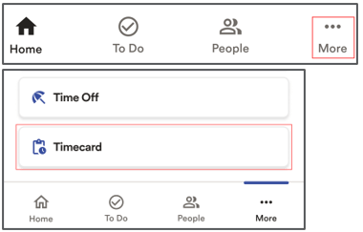
2. From the Timecard menu the current, and next pay period timecards are accessible for viewing only by default.
Viewing Your Schedule
1. Log into the ADP Mobile Solutions App.
2. Select the Schedule option from the Recommended options.
Alternatively, navigate to More and select Schedule.
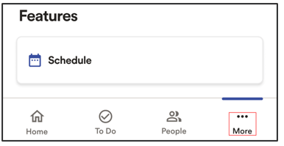
3. Your schedule will display.
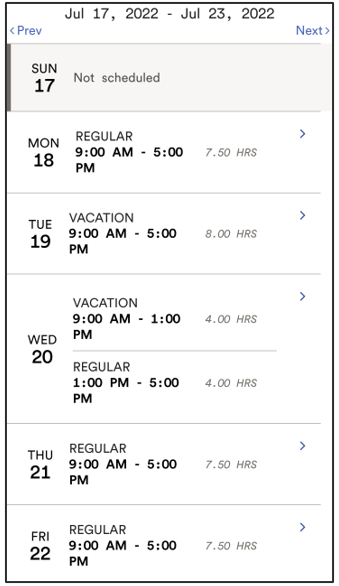
To obtain a more detailed view of the day, click the arrow to reveal additional information.

- Employee Access website:
MyAccess.adp.com - App Name:
ADP Mobile Solutions App – Available for Apple and Android
Logging in and navigating to Time Off:
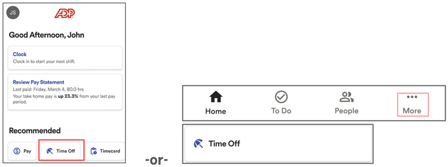
1. Log into your ADP Mobile Solutions App – use your Employee Access Login.
2. Select Time Off from the Recommended Options
Alternatively, select More and Time Off
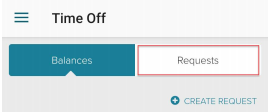
3. If your employer uses ADP Time and Attendance to track your Time Off, you can view your
current balance by selecting the Balances tab Not sure? Ask your HR Manager
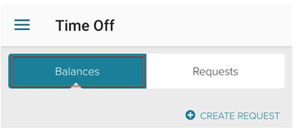
4. To view Approved, Pending, or Cancelled Request select the Requests tab
Create and Submit Time Off:
1. From the Time Off menu select Create Request

2. From the Create menu you can begin requesting your time.
Policy Type: Select the type of Time Off you will be using. (i.e. Vacation, Sick, Personal,
etc.)
All Day: Only select this if you will be out of the office your entire scheduled workday
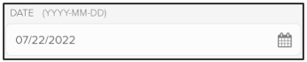
Start and End Date: Enter the day you are requesting time off for
Start and End Time: Enter your scheduled hours for these times
Select Create
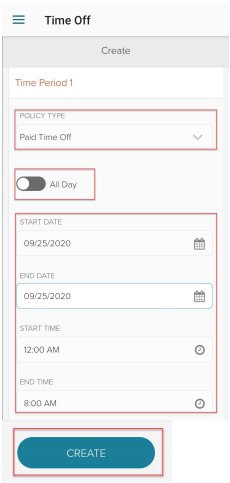
NOTE: We recommend creating a separate request for each day of Time Off being requested.
3. From the Confirm menu you can review your request and ensure accuracy
Approve By: System will always default to the day prior. If advanced notice is needed
reach out to your supervisor or HR manager to avoid delays
Policy Type: Verify correct Time Off code is being used
Start and End Date: Verify the day(s) your time off request
Start and End Time: Verify your start time; recommend using your actual scheduled start
time
Daily Time: You will want to set this to the total number of hours you work daily. i.e. 8.00
hours
a. If the request is for partial day enter the total number of hours of time needed. i.e.
4.00 hours
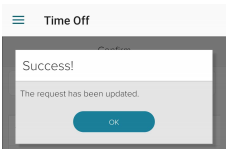
4. Select Update Changes

5. Upon update your will receive the Success! Message. Click OK
Questions regarding your Time Off request or balance?
Reach out to your supervisor or HR Manager for support
Accessing the Phone Module
1. Dial the access number that has been provided to you.
2. When prompted, enter the following information and press # after each entry:
- Phone user ID number
- Phone PIN
Note: The system will announce several menu options. The exact menu items and corresponding keys will
vary depending on the labor charge categories your company uses.
3 . Follow the instructions below to complete your desired tasks.
To Clock In or Out
Clocking In: From the main menu, press 1.
- The date and time of your clocking transaction is announced.
- Hang up to exit the system.
Clocking Out: From the main menu, press 2.
- The date and time of your clocking transaction is announced.
- Hang up to exit the system.
Clocking Out for Lunch: From the main menu, press 3.
- The date and time of your clocking transaction is announced.
- Hang up to exit the system.
Note: Some companies do not distinguish between clocking out and clocking out for lunch. If you
To Change Your PIN
1. From the main menu, press the key that is announced for changing your PIN.
2. Enter your new PIN and press #.
- (If you select a PIN that does not meet your company’s requirements, the system will provide feedback.)
3. Re-enter your new PIN and press #.
4. Hang up to exit the system.
To Report an Absence
1. From the main menu, press the key that is announced for reporting an absence.
2. To report your absence for today, press 1.
- To report your absence for tomorrow, press 2.
3. Follow the prompts and press the key that corresponds to the reason for your absence.
4. When your absence reason is announced, press 1 if it is correct.
- If it is incorrect, press 2 and repeat steps 1-3. 5 Hang up to exit the system
To Report a Late Arrival
1. From the main menu, press the key that is announced for reporting a late arrival.
2. To report your late arrival for today, press 1.
To report your late arrival for tomorrow, press 2.
3. Enter your expected time of arrival as a four-digit number
- (for example, to enter 9:00, press 0-9-0-0).
4. For a.m., press 1. For p.m., press 2.
5. When the date and time of your late arrival is announced, press 1 if it is correct.
- If it is incorrect, press 2 and repeat steps 1-4.
6. Hang up to exit the system.
To Transfer Hours to a Different Labor Category
1. From the main menu, press the key that corresponds to the labor category
- (for example, Department) for which you want to perform a transfer.
2. Enter the ID number (for example, a specific Department number) to which you want to transfer your time and press #.
3. When the ID number you entered is announced, press 1 if it is correct.
- If the information is incorrect, press 2 and repeat steps 1-3.
- Tip: To cancel the labor transfer, press *.
4. If you need to enter transfers in other categories (for example, Job), repeat steps 1-3.
5. Hang up to exit the system.
Note: Not all features may be available to you. If you are unsure what is available; speak with your HR
Manager
Supervisor Guides
Recording Worked Time
1. Log onto ADP Mobile Solutions App.2. From the Mobile Dashboard navigate to More and tap Team Manager Actions.
4. From the Employee Timecard Click on the plus sign to add time for that day.

5. From the Earnings Code Type drop-down, select Worked.

6. Enter Start time by using the Clock, Click Set.
Alternatively, select the keyboard (![]() ) icon to type times in.
) icon to type times in.
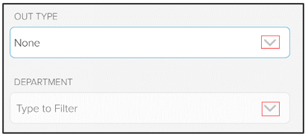
8. If needed, Enter the Out Type for tracking meals and Select the Department for the time pair.
Out Type: This field can be used to track the Meal Punch option.
Department: Assign a specific department for the time pair

Recording Non-Worked Time
Non-worked is to record Paid or Unpaid Time off.

3. Enter Start and End using the Clock or Keyboard option and click Set.
4. On the Add Entry page, enter the total hours of non-worked time, and tap the Check to record.
2. To make edits, Click on Start and End Time and adjust the hours by using the Clock or Keyboard option. Finalize by selecting Save Entry.
1. From the Employee Timecard Click on the plus sign to add time for that day.
2. From the Earnings Code drop-down, select the Supplemental Earnings to apply. i.e. Mileage

i.e., Commissions: 10.00. Enter dollar amount.


View Your Team Schedule
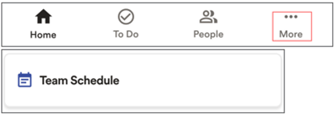
1. Log onto ADP Mobile Solutions App.2. From the Mobile Dashboard navigate to More and tap Team Schedule.
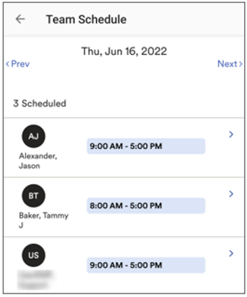
The Team Schedule page allows you to quickly view how many direct reports are schedule to work that day.
Edit an Existing Schedule
1. From the Team Schedule Click on the employees’ name to expand their schedule.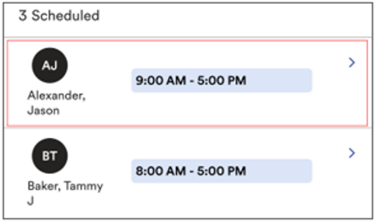
2. Click the Edit (
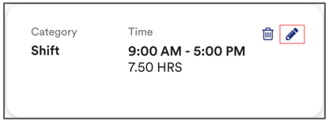
A confirmation message will pop up showing the schedule update was successful, Tap X to close.
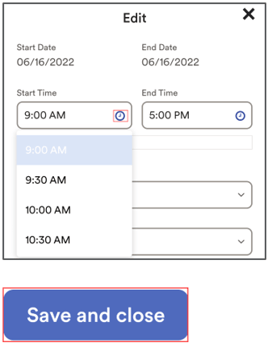
Add a New Schedule
1. From the Team Schedule Click on the Add to Schedule.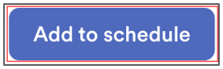

3.Enter Start and End time under the Shift tab. Click Save and Close.
There are alternate options available to enter for the schedule. The Pay Code, Department, and Meal Plan options, if used, will overwrite the settings assigned to their pay class. This can interfere with proper timecard calculations, including meal deductions/pay and overtime.
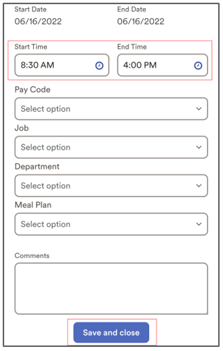
A confirmation message will pop up showing the schedule update was successful, Tap OK.
Delete an Employee Schedule
1. From the Team Schedule Select the Date, and employee’s name to expand your schedule.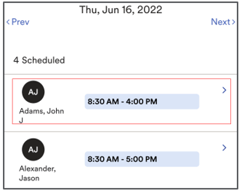
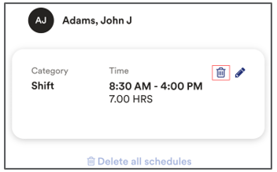
3. Tap Delete.
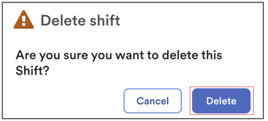
A confirmation message will pop up showing the schedule update was successful, Tap OK.
Managing Time Off Request with ADP Mobile Solutions App
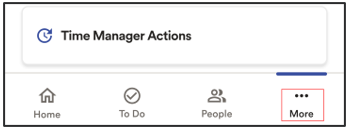
1. Log onto ADP Mobile Solutions App.
2. From the Mobile Dashboard navigate to More and tap Team Manager Actions. 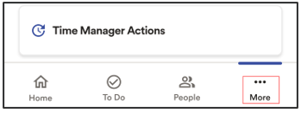
3. To access your employees’ time off, tap on the 3-dot menu by their name, and select Time Off.


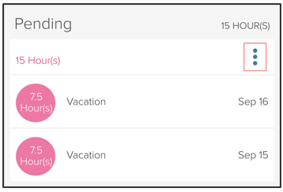
5. From the Pending requests section, select the 3-Dot menu to manage the employees’ time off request.
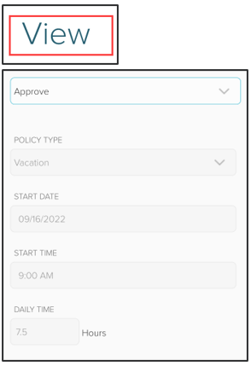
6. Selecting the View option shows more detail on the actual request.
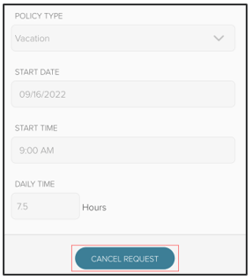
7. Selecting the Cancel option will allow you to Cancel the Full Request.
Commonly used to remove a previously approved or inaccurate date request.
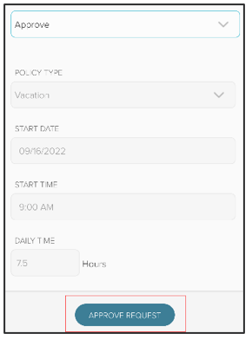
8. Selecting the Approve option will allow you to Review and Approve the requested time off.
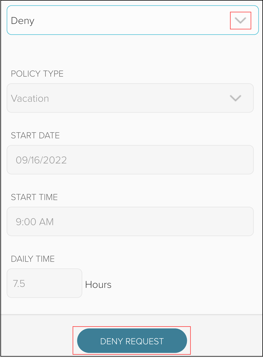
9. Selecting the Deny option will allow you to Review and Deny the requested time off.
Helpful Tips:
- If an employee submits a request with more than one day, needs to cancel one of the days, the full request will need to be canceled to remove the approved time off from the schedule.
- The employee can resubmit with the correct date, or the manager can remove it from the timecard after it has posted.
- Time off requests, by default, will post the morning after the requested day off.
- A request with more than one day allows for individual approval or denial.
- If only part of the time off requested dates is approved the employee will receive a notification. They must accept the notification before it will appear on their schedule.
- The system requires, by default, that all time off requests are approved 24 hours in advance from the requested day off.
- Any time less than 24 hours will not post to the timecard, even if it shows in the schedule.
- ADP Time & Attendance allows for employees to request time even if their balance may go into the negative.
- Managers and Admins must review approved vs. scheduled time prior to accepting the request.
Approving a Shift Swap
1. Log onto the ADP Mobile Solutions app.
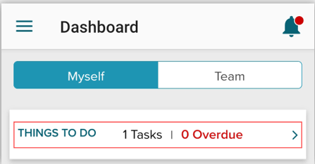
2. Tap Things to Do.

2. Tap Things to Do.
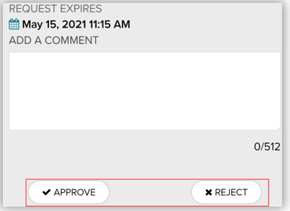
4. Enter a comment (optional).
- Supervisors can either Approve or Reject the shift swap
- Supervisors are only able to see shift swaps associated by employees assigned directly to the supervisor.
Employees’ schedules will now be updated with the new shift.
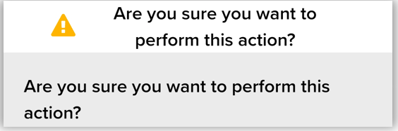
Confirm action by selecting Yes on the follow screen.
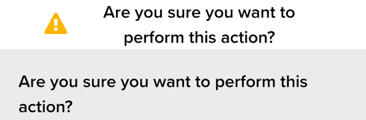
Employees’ schedules will now be updated with the new shift.