Employee Guides
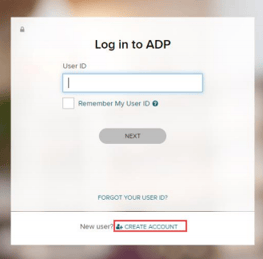
Access the RUN employee login page at https://my.adp.com . Click Create Account.
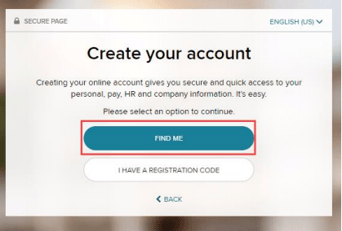
On the Create your account screen, click FIND ME.
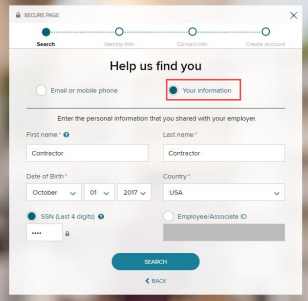
Under Help us find you, select Your information, then fill out the fields below and click
Search.
Note: 1099 contractor? Enter your hire date in the Date of Birth fields.
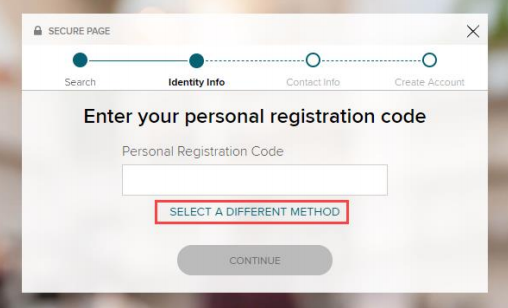
On the Enter your personal registration code page, click SELECT A DIFFERENT METHOD.
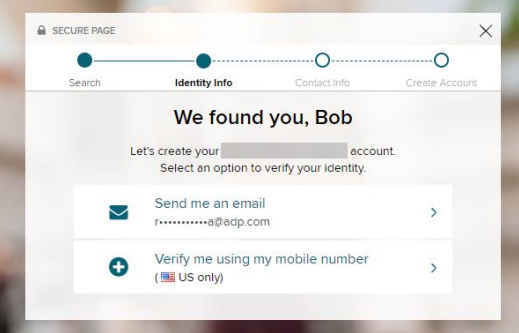
On the We found you page, click to verify via email or mobile. A Personal Registration code
will be sent to your method of choice.
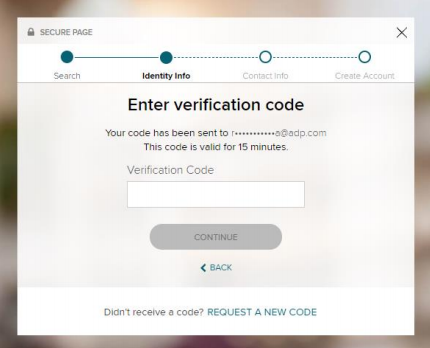
Enter your verification code and click Continue.
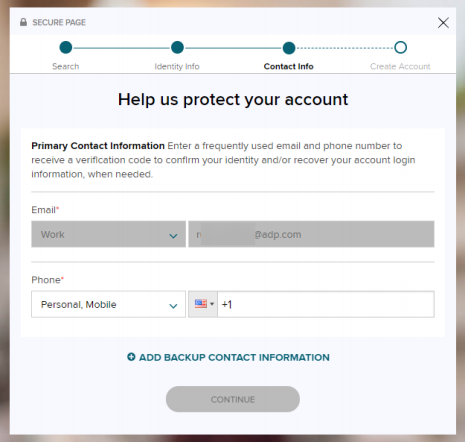
Complete your phone number entry on Help us protect your account and click Continue.
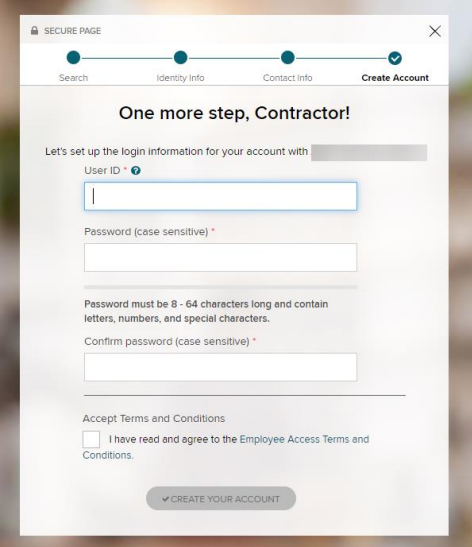
On the One more step page, select a user ID and password, and confirm your password. Check
the box to accept Terms and Conditions and select CREATE YOUR ACCOUNT.
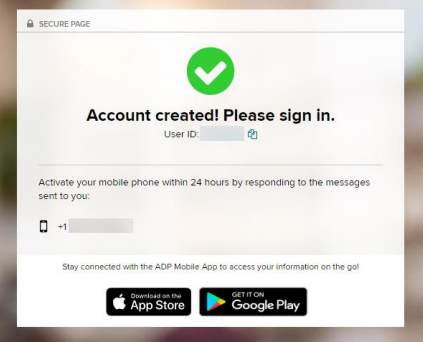
Success! You’ve created your account! Take note of your user ID and password and activate your
phone number within 24 hours – we’ll text you with a code.
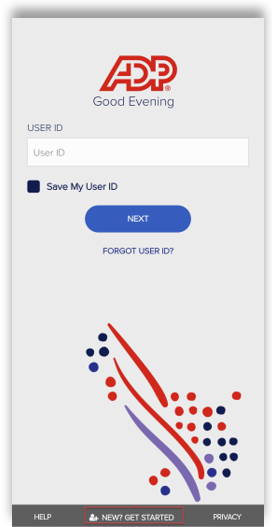
1. Open ADP Mobile Solutions App.
2. From the Log on Page, click on New? Get Started.
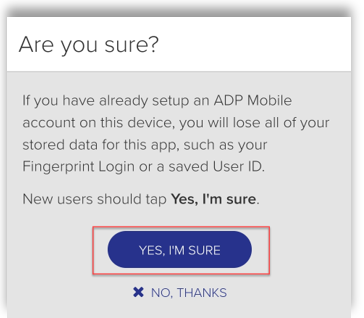
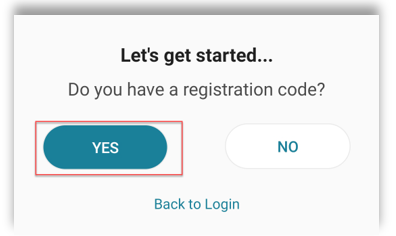
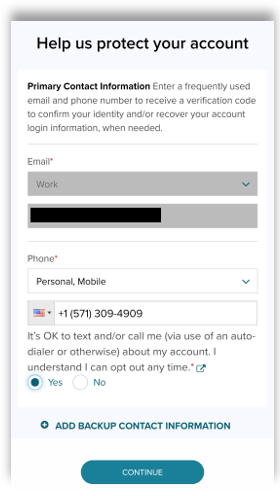
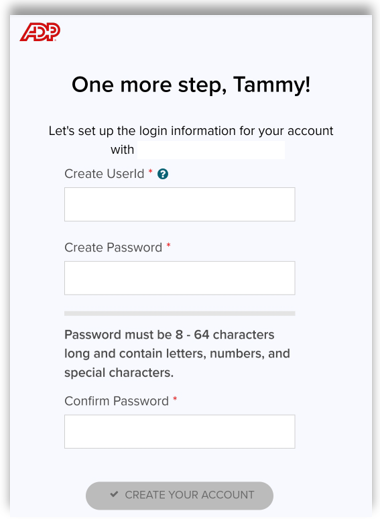
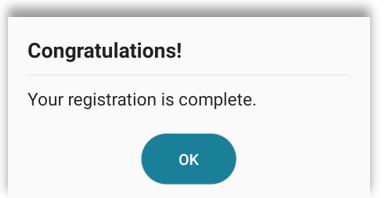
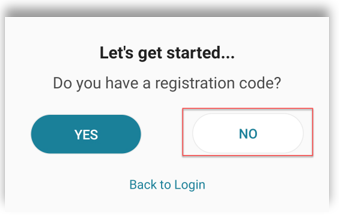
Don’t have a Registration Code? Select No.
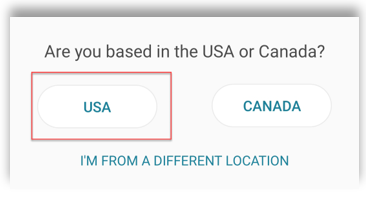
1. Select USA for your location.
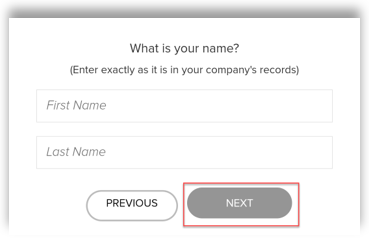
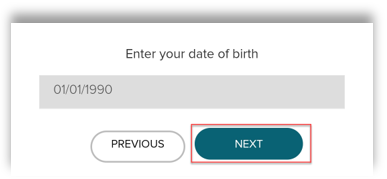
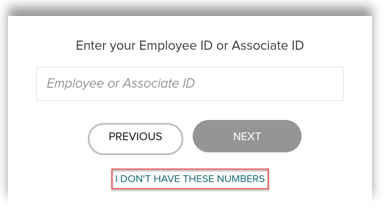
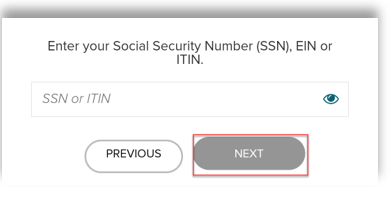
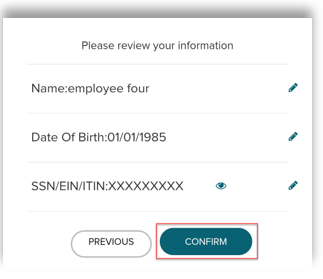
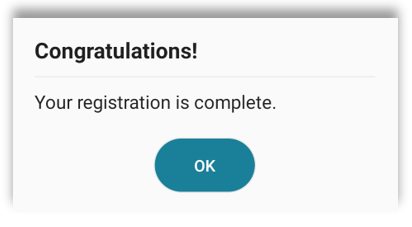
Common Registration Issue Message
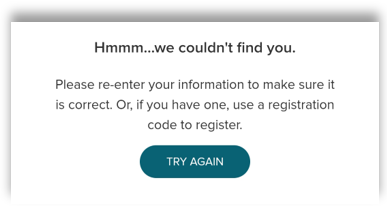
Please reach out to your HR Administrator to verify that your Name, Social Security number, and Date of Birth are entered correctly in the payroll and/or time system.
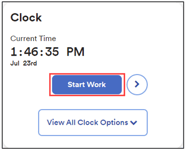
2. To begin your shift, navigate to the clock tile on the MyADP dashboard, and select Start Work.
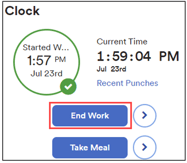
3. For employee to end their shift, navigate to the clock tile, and select the End Work
Punching Out for a Meal Break
1. From the MyADP Dashboard, navigate to the clock tile, and Select the Take Meal
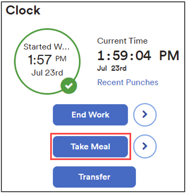
2. For employee to return from their meal, navigate to the clock tile, and Select the Start Work
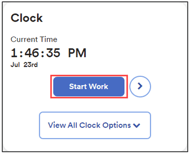
Transferring Departments
1. From the MyADP Dashboard, navigate to the clock tile, and select the Transfer
Alternatively: Select View all Clock Options and choose Transfer.
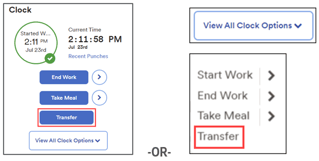
2. From the Transfer Menu, Tap the Expansion Arrow to choose the appropriate Department.
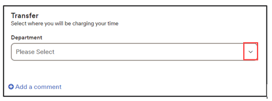
3. Hit Transfer icon to submit a department change.

Review Recent Punches
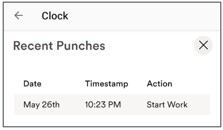
1. From the MyADP Dashboard, navigate to the clock tile, and select Recent Punches. 
2. From the Recent Punches Screen there is a list of the most recent punches.
OR-
Review Timecard
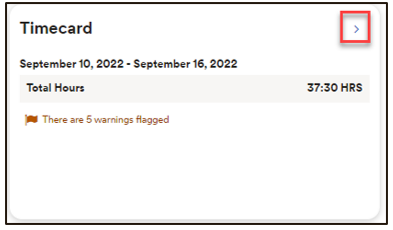
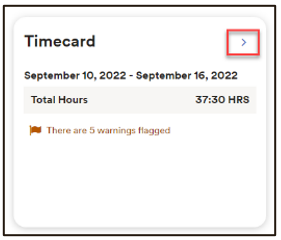
From the MyADP Dashboard, navigate to the timecard tile, and select the arrow to open your timecard.
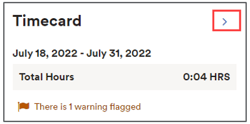


Please check with your manager to determine if employee notes are active for your profile.
1. From the MyADP Dashboard, navigate to the clock tile, and prior to recording your punch select the arrow next to the punch type.
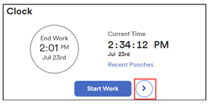
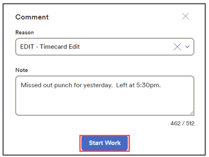
2. From the comment window, expand Reason by selecting the arrow.

3. Choose the edit reason that best represents your note category.

Recording Worked Hours with MyADP
-
Log into myaccess.adp.com
-
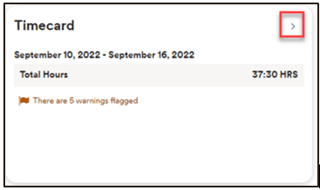
Expand the Timecard option from the main dashboard page or select Clock icon on left navigation bar.
-
Click the Plus (+) icon to add hours to a specific day.

-
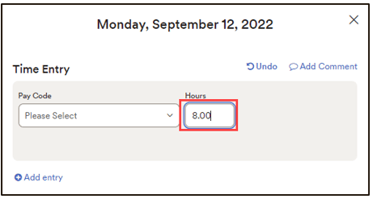
Enter the number of Hours to report for that day, Click Save and Close.
Recording Non-Worked Hours with MyADP
-
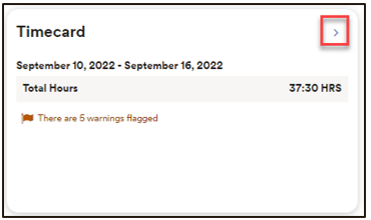
Expand the Timecard option from the main dashboard page or select Clock icon on left navigation bar.
-
Click the Plus (+) icon to add hours to a specific day.

-
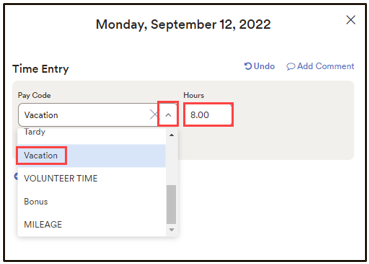
Enter the number of Hours to report for that day and select the Pay Code from the drop-down box. (i.e. Vacation), Click Save and Close to record your non-worked time.
Assigning a Department through MyADP
-
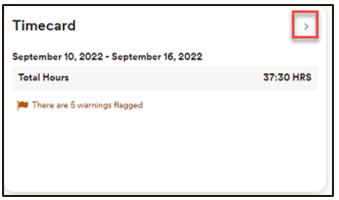
From the Employee Access Dashboard, click the Timecard icon.
-
Click the Plus (+) icon to add hours to a specific day.

-
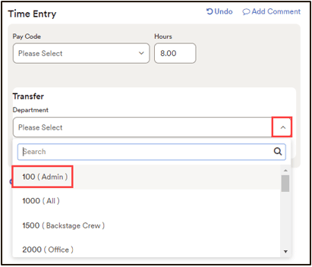
With your Hours entered, select the Department from the drop-down box under Account. Click Save and Close to update your Department.
Add an Additional Time Pair in MyADP
-
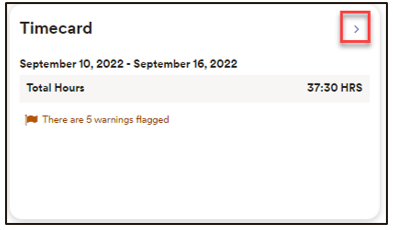
From the Employee Access Dashboard, click the Timecard icon.
-
Click the Plus (+) icon to add hours to a specific day.

-
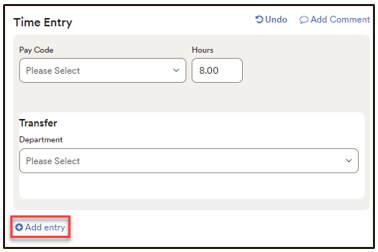
Click Add Entry to add another time pair to a specific day.
Review Timecard through MyADP
-
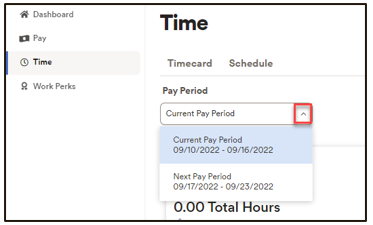
From the MyADP Menu, tap Time. Expand the Timecard option from the main dashboard page or select Clock icon on left navigation bar.
-
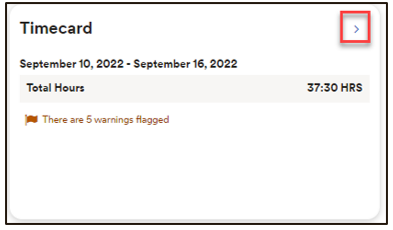
From the Your Timecard menu the previous, current, and next pay period timecards are accessible for viewing only by default.
Print Your Timecard through MyADP
-
From the MyADP Menu, tap Time. Expand the Timecard option from the main dashboard page or select Clock icon on left navigation bar.
-
From the Your Timecard menu, click Print Timecard to choose your Printer.

Recording Worked Times with MyADP
- Log into myaccess.adp.com
- Expand the Timecard option from the main dashboard page or select Clock icon on left navigation bar.
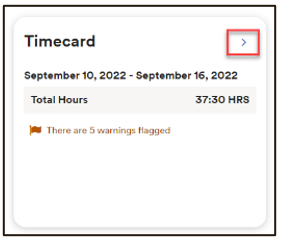
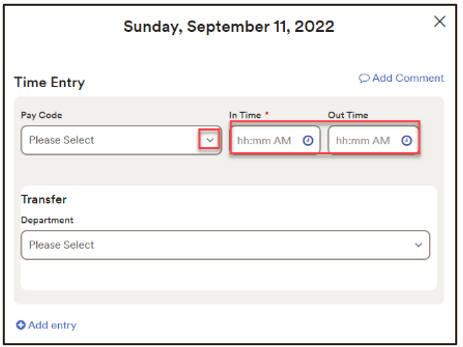
- To add time to the timecard, select the plus icon on the day worked (or the pencil icon if there’s already an entry on that day).
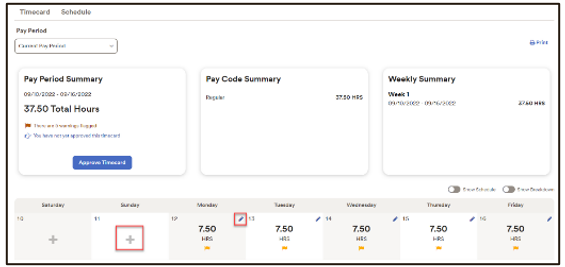
- On the Date pop-up Window enter the In and Out time of your worked day (and optional Pay Code). Select Save to record time.
Recording Non-worked Times with MyADP
- Log into adp.com
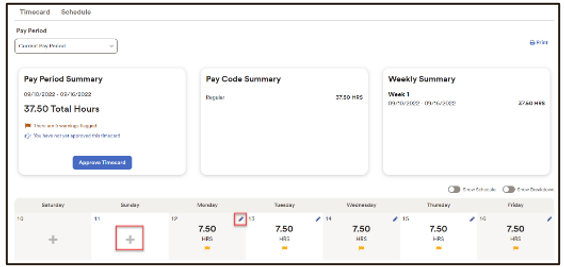
- Expand the Timecard option from the main dashboard page or select Clock icon on left navigation bar.
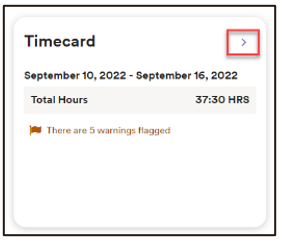
- To add time to the timecard, select the plus icon on the day to record non-worked times.
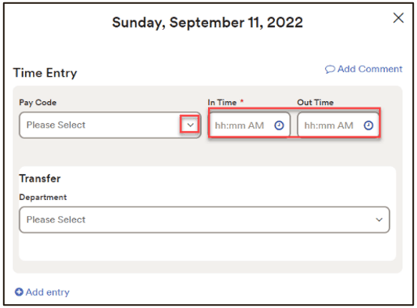
- On the Date pop-up Window enter the In and Out time and Pay Code of your non-worked day. (i.e. Vacation). Select Save and Close to record time.
Assigning a Department through MyADP
- From the Employee Access Dashboard, click the Timecard icon.
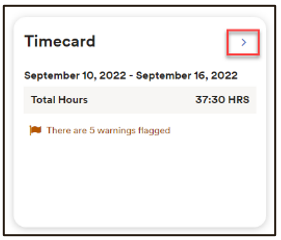
- Click the Plus (+) icon to add hours to a specific day.
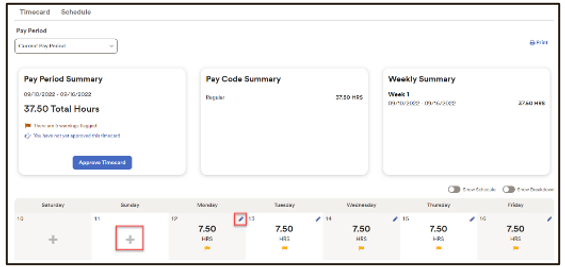
- With your Hours entered, select the Department from the drop-down box under Account. Click Save and Close to update your Department.
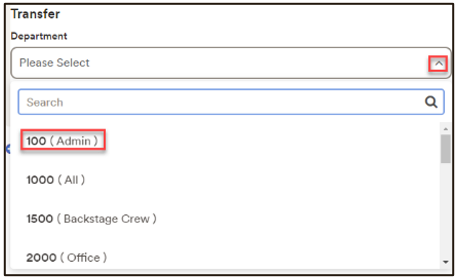
Add additional Time Pair in MyADP
- From the Employee Access Dashboard, click the Timecard icon.
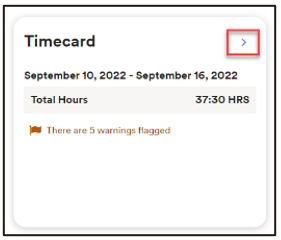
- Click the Pencil icon to add hours to a specific day.
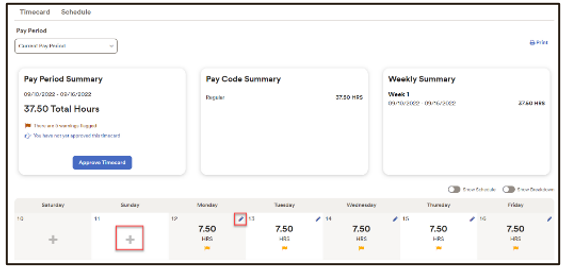
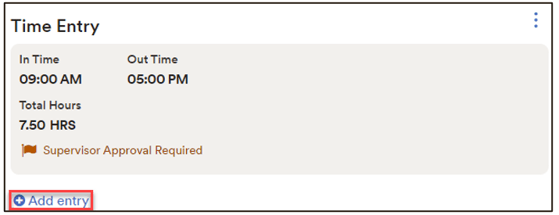
- Click Add Entry to add another time pair to a specific day.
Review Timecard through MyADP
- From the MyADP Menu, tap Time. Expand the Timecard option from the main dashboard page or select Clock icon on left navigation bar.
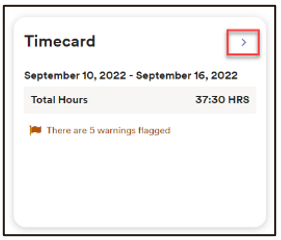
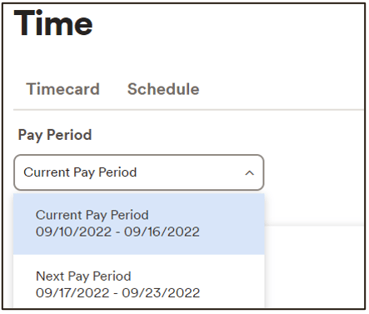
- From the Timecard menu the previous, current, and next pay period timecards are accessible for viewing only by default.
Print Your Timecard through MyADP
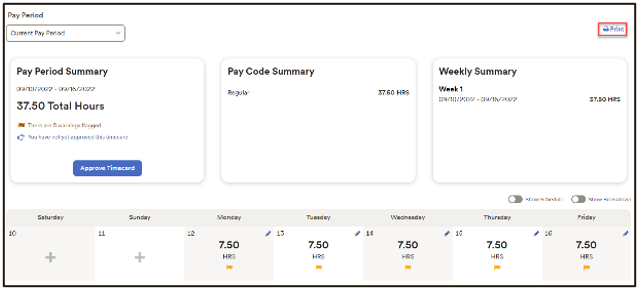
- From the MyADP Menu, tap Time. Expand the Timecard option from the main dashboard page or select Clock icon on left navigation bar.
- From the Timecard menu, click Print Timecard to choose your Printer.
Recording Supplemental Pay Codes with MyADP
- Log into myaccess.adp.com
- Expand the Timecard option from the main dashboard page or select Clock icon on left navigation bar.
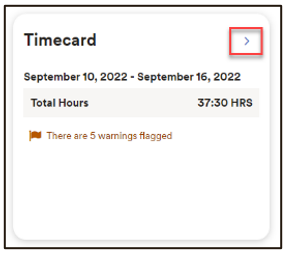
- To add a supplemental pay code to the timecard, select the plus icon on the day you wish to record the value (or the pencil icon if there’s already time on that day).
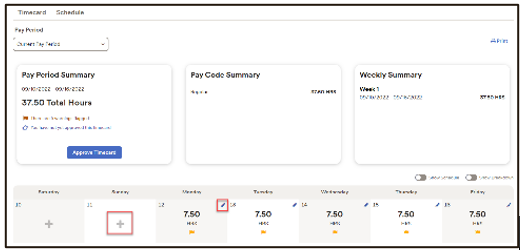
- On the Date pop-up Window, expand the Pay Code box and select the appropriate Supplemental Pay Code (i.e. Mileage). In the amount field enter the total units or dollar amount for the supplemental code. If unsure which value to enter, reach out to your supervisor. Select Save to record the value.
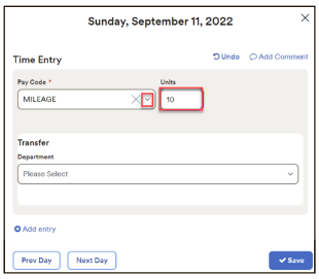
Recording Supplemental Pay Codes with ADP Time and Attendance
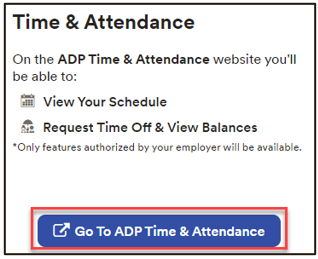
- From MyADP select Go to ADP Time & Attendance or log into https://time.adp.com
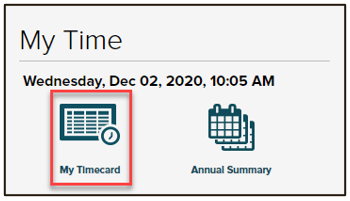
- Click on My Timecard.
- Click in the Supplemental Pay Codes

- To record a supplemental pay code, select the date, search for the supplemental pay code, and enter the amount. Hint: To add additional rows, hit the plus sign next to the day.

- Once supplemental pay code amounts have been entered, click on Save.

Submitting a Time Off Request in ADP Time and Attendance
- Log into myaccess.adp.com, from the Dashboard Click Go to ADP Time & Attendance. Alternatively, you can log into https://time.adp.com.
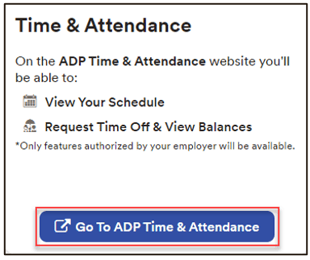
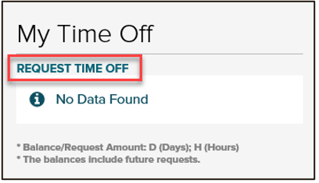
- From the My Time Off section, click Request Time Off.
- In the Description and Comments fields, type a name or description of the request.

- From the Calendar, select the date or dates you want to request off.
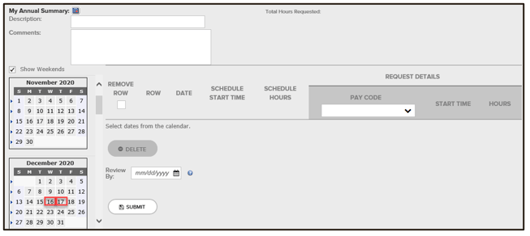
- From the Pay Code list of each row, select the Pay Code to use.

- In the Start Time field of each row, enter the time you want to begin your time off.

- In the Hours field of each row, enter the number of hours you want to take off.

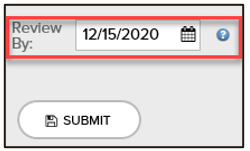
- In the Review by field, type the date by which you want your supervisor to respond to your request.
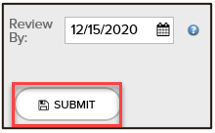
- Click Submit
Reviewing Previously Requested Time Off
Visit the Message Center for updates on the status of your request.

-OR-
From the Home page of Time and Attendance.
- Select Myself
- Personal Information
- My Time Off Requests
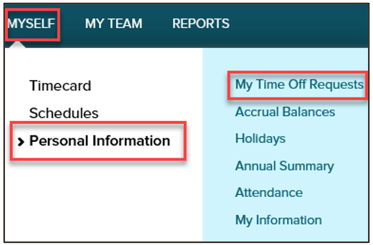
Both options will bring you to the My Time Off Request page in which you can view all past, current, or future time off that has been requested.

Viewing Your Accrual Balances
In Employee Access:
1. From the Dashboard page at myaccess.adp.com, select Go to ADP Time & Attendance.
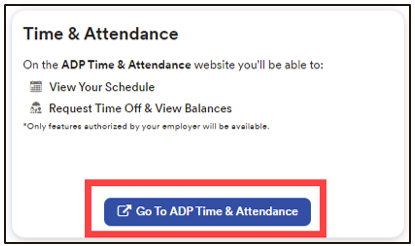
In ADP Time & Attendance:
2. From the Time & Attendance Common Tasks page a Summary of your accrual appears in the My Time Off section.
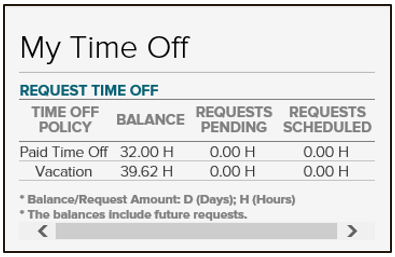
3. To view a more detailed breakdown of your accrual balance navigate to Myself > Personal Information > Accrual Balances.
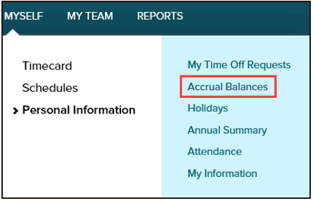
4. Click the hyperlink for the description you are wishing to review.

5. Click the number in the Totals Hours Balance row.

Initiating a Shift Swap in MyADP
- Log onto myaccess.adp.com and navigate to the Time option, then click on Schedule; or click on Schedule directly from the Dashboard.
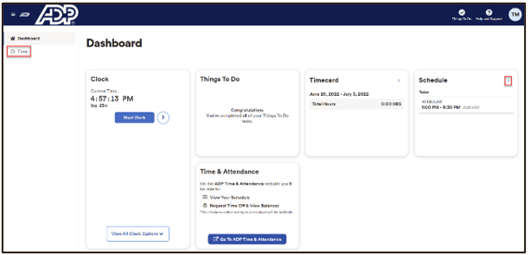
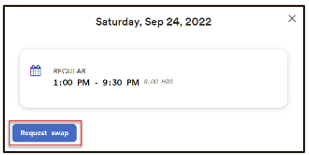
- Click on a future date’s scheduled time and then click on Request swap. Click on Search to view the available shifts to swap with.
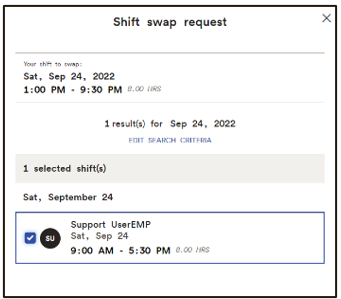
- Checkmark the people who you would like to request a swap with. Click Next.
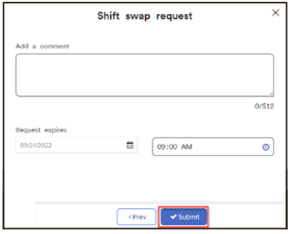
- Add a comment, if needed, and click Submit. A confirmation message appears with the details of the swap request.
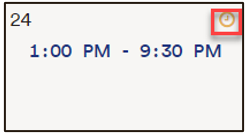
- The pending request will appear as a clock icon on the requested day until accepted by the other employee (and Supervisor if supervisor approval is needed).
Accepting a Shift Swap in MyADP
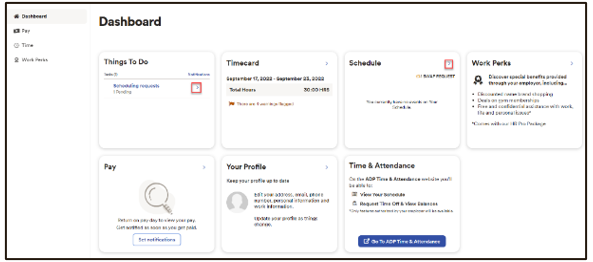
- Log onto myaccess.adp.com and click on the Things To Do notification, or on the Schedule
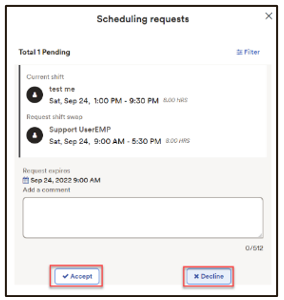
- Review the request and either Accept or Decline the request.
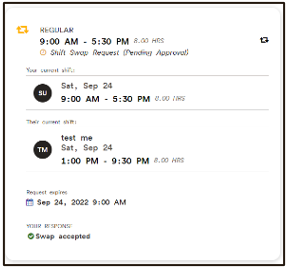
- If a supervisor’s approval is needed for the swap, you will see a clock icon on the day on the schedule, and if you click it you will see the swap is Pending Approval.
Approving Your Timecard through MyADP
1. Log into myaccess.adp.com, expand the timecard tile or click on the Time icon in the left navigation bar.

2. Review and confirm the information is accurate. Then, click Approve Timecard.
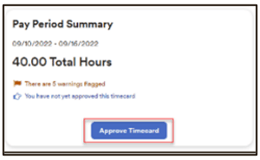
3. On the Attestation pop-up window, hit OK to agree that all hours are accurate.
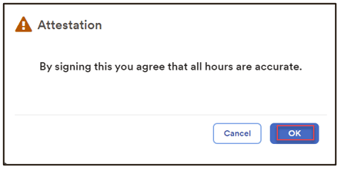
4. Timecard Approval timestamp appears within the Approval box once successful.
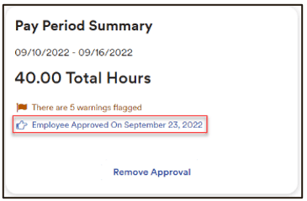
5. To remove timecard approval; click Remove Approval.
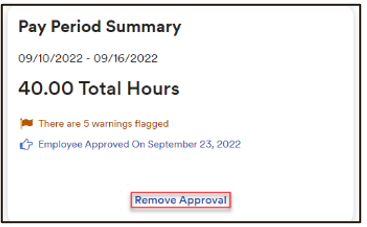
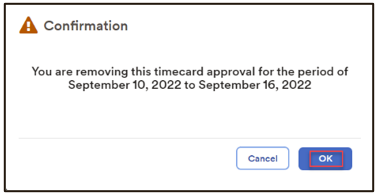
6. From the Confirmation pop-up window, click OK to remove approval.
Approving Your Timecard through ADP Time & Attendance
1. From the MyADP Dashboard, select Go to Time and Attendance, or log into https://time.adp.com.
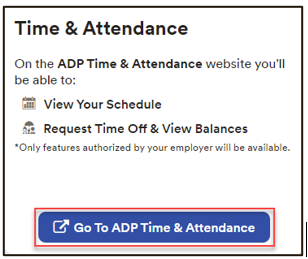
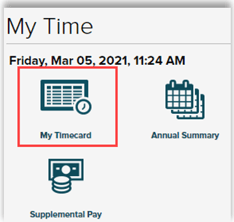
2. From the Home Page of ADP Time and Attendance, click My Timecard.
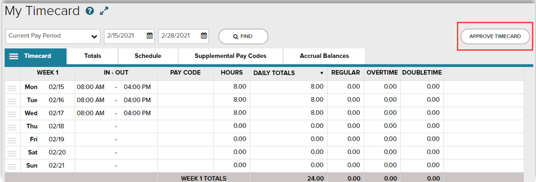
3. Review and confirm the information is accurate. Then, click Approve Timecard.
4. From the Approve Timecard pop-up window, click Approve.
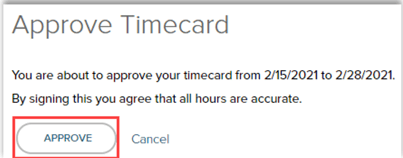
5. Point to the Approved Button to see an approval timestamp.

6. To remove approval; click the drop-down arrow and then click Remove Approval.

Supervisor Guides
Accessing Individual Employee Timecards
1. Log onto myaccess.adp.com
2. From the MyADP Dashboard navigate to Go to Time and Attendance. Note: Timecard management can only be performed directly in ADP Time and Attendance.
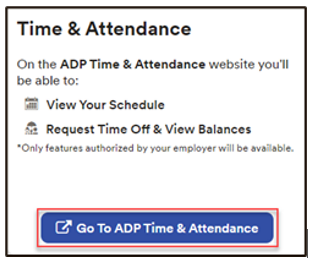
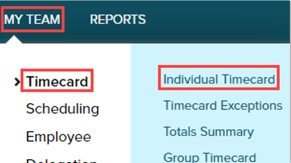
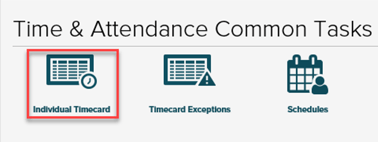
3. From ADP Time & Attendance Common Tasks, select Individual Timecard -OR- My Team > Timecard and select Individual Timecard

-OR-
Recording Worked Time
1. In the In/Out field of the row you want to edit, type the in/out punch time.
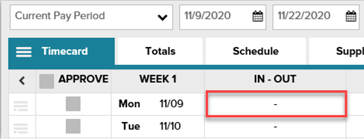
2. Once time pairs have been entered, click on Save.

Recording Non-Worked Time
1. In the row you want to edit, type the number of hours in the Hours field and click on the Pay Code field to select the desired Pay Code. 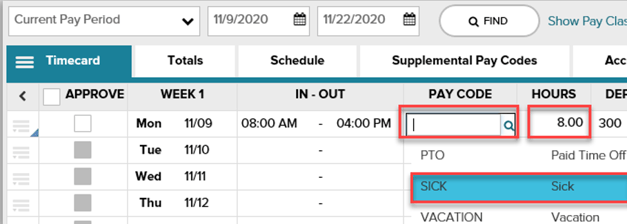
2. Once pay code has been entered, click on Save.

Correcting Timecard Exceptions
1. From ADP Time & Attendance, choose My Team, Timecard, and Timecard Exceptions.
- Alternatively, you can make corrections on your employees’ individual timecard.
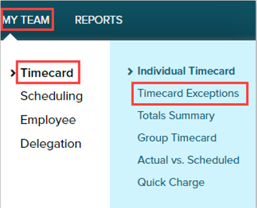
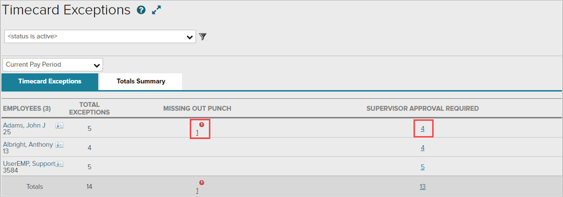
2. On the Timecard Exceptions page, click the exception you wish to resolve.
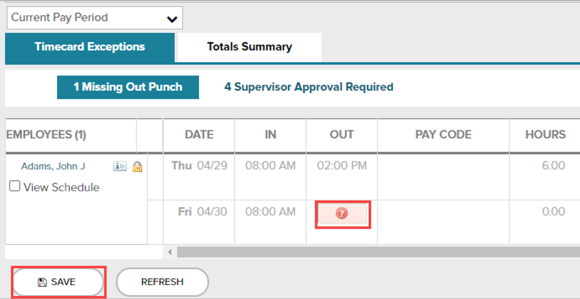
4. Approve any timecard fully by clicking each box, select Save. Only necessary if company has turned on supervisor approval.

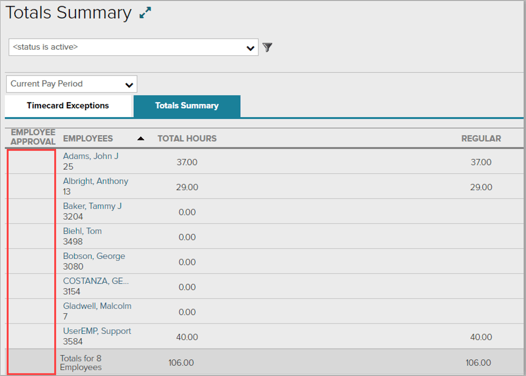
Totals Summary Page
- This page can provide a quick look of your employees’ total hours for the pay period.
- If employee approval is enabled on the company level, you can view which employees have approved or not approved their timecard.
Reviewing Your Teams’ Group Timecard
Group timecard allows Supervisors to view all employee hours for a particular day.
1. Navigate to My Team > Timecard > Group Timecard. 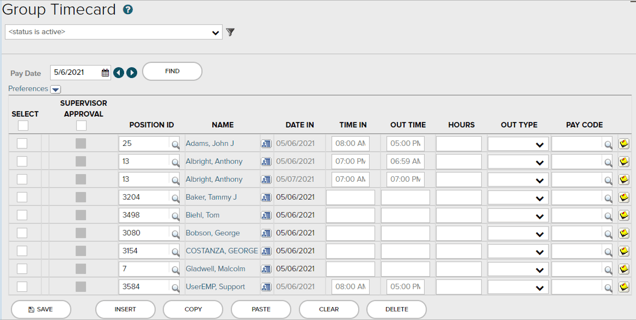
Recording Supplemental Pay Code Amounts
1. From the ADP Time & Attendance Common Tasks, click the Individual Timecard icon, choose Supplemental Pay Codes

2. To record a supplemental pay code, select the date, search for the supplemental pay code, and enter the amount. Hint: To add additional rows, hit the plus sign next to the day.

3. Once supplemental pay code amounts have been entered, click on Save.

Assigning Departments
1. Click the in the Department field and select the desired Department.

2. Once department has been entered, click on Save.

Adding, Copying Rows and Deleting Rows
1. From the ADP Time & Attendance Common Tasks, click the Individual Timecard
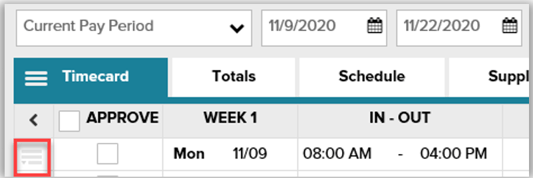
-
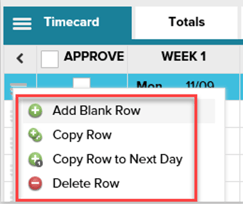
- To add a row to that date, click Add Blank Row.
- To add an identical row, click Copy Row.
- To copy a row to the next day, click Copy Row to Next Day.
- To Delete a row, click Delete Row.

Adding Notes
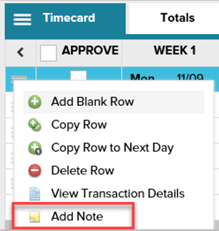
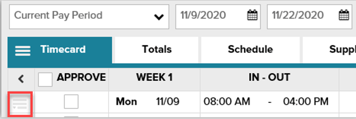
1. Click the Action icon in the row you want to add a note.

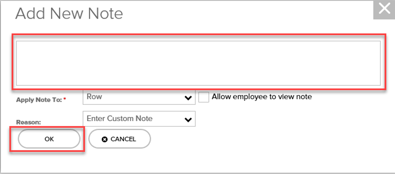
3. In the blank field, type the note. Once completed, click OK.

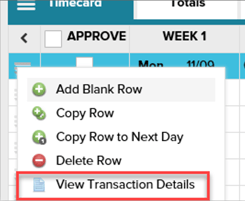
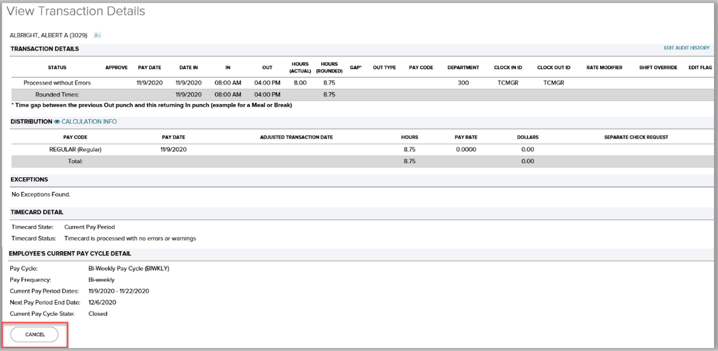
Viewing Transaction Details
1. Click the Action icon in the row you want to View Transaction Details.
Approving Employee Timecard
1. After reviewing your employees’ timecards, click Approve Timecard.


A Green Check mark will appear on the Approve button to show it's been approved.


Objective:
- Managing schedules with ADP Time & Attendance Note: Team Schedule is currently not available through MyADP.
Managing Schedules with ADP Time & Attendance
1. Log onto myaccess.adp.com.2. From the MyADP Dashboard navigate to Go to ADP Time & Attendance.
Managing Schedules with ADP Time & Attendance
1. Log onto myaccess.adp.com.2. From the MyADP Dashboard navigate to Go to ADP Time & Attendance.

The schedule templates option allows you to review, manage, and create new recurring schedules.

The monthly schedules option allows you to view each month of an individual employee.
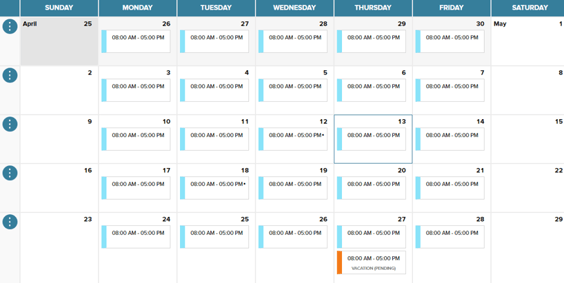
Creating a New Schedule Template
1. From My Team , Scheduling, Schedule Templates, click Create New.

2. Enter Name of Shift and

3. Enter the first day of your current pay period in the “This template will be available starting on”.

4. Control + Left Click all days with the same schedule.

5. Enter Start and End time, select Save.
Note: We highly recommend not entering any additional information in the schedule. All configurations are controlled on a pay class level and this information can interfere with normal processing.
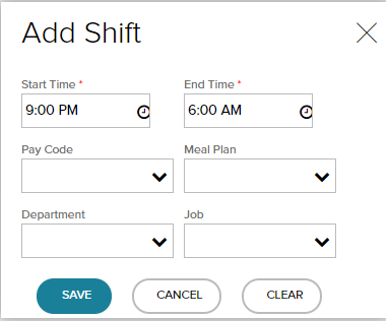
6. Click Save Template.

7. Click Manage Assignments.

8. Check the box next to each employee you wish to assign the schedule to, click Next.

9. Enter the start date for each employee (use the first day of current pay period), click Submit.
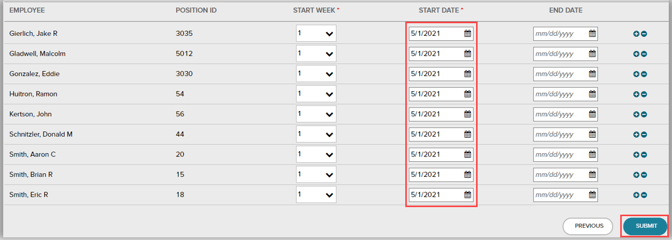
A confirmation message will appear once the schedule has been saved successfully.

Remove a Recurring Schedule Template
1. From My Team , Scheduling, Schedule Templates, click Manage Assignments.

2. Check the box next to each employee you wish to remove the schedule from, click Remove Assignments.

3. On the Remove Assignments pop-up choose either to remove all applied scheduled since the start of the current period or the future shifts.

Edit an Employee’s Schedule
1. From My Team , Scheduling, Schedules.
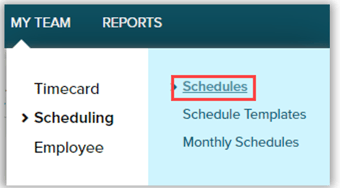
2. To edit an individual day: Click on the day you wish to edit, choose the Edit (![]() )icon.
)icon.

3. Change the Start or End time, click Save.
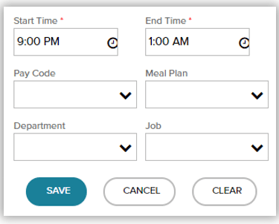
Add Quick Shifts
1. From My Team , Scheduling, Schedules, More, and click Quick Shifts.
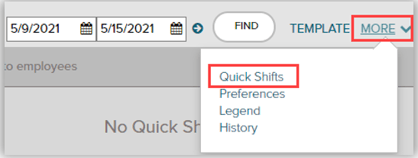
2. Click Add.

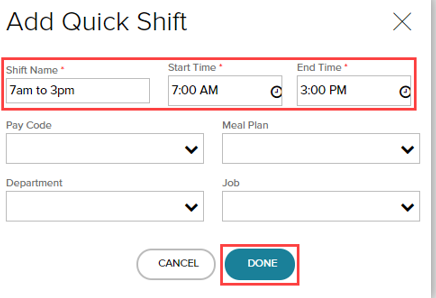
3. Enter name, start, and end time, click
Assign Quick Shifts
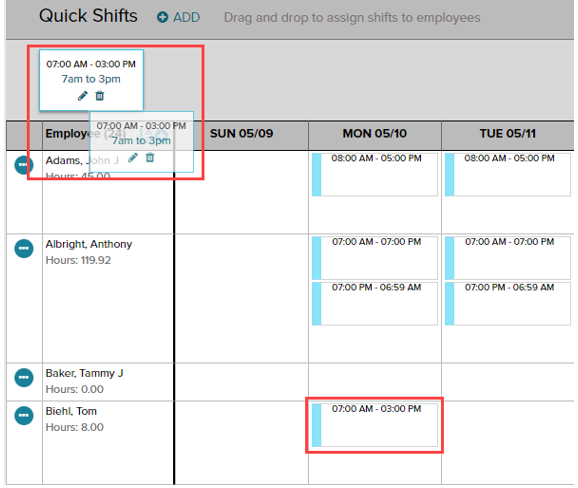
1. From My Team , Scheduling, Schedules, More, and click Quick Shifts.
2. Click and Drag the Quick shift to the Employee row and Date to apply the shift to.
Managing Time Off Requests
1. Log onto myaccess.adp.com
2. From the MyADP Dashboard navigate to Go to Time and Attendance. Note: Timecard management can only be performed directly in ADP Time and Attendance.
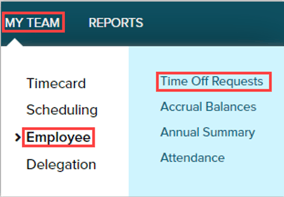
3. From ADP Time & Attendance home page, select My Team > Employee > Time Off Request
4. On the Time Off Requests screen click the Request Number.

There are four options available for time off requests.
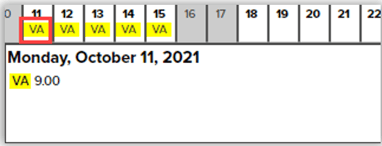
- Approve: Entire requested time will be approved and appear in the schedule.
- Will not post to the timecard until the day after the date requested off.
- e. October 11th requested and approved. Will post to the timecard on October 12th.

- Deny: Entire requested time will be denied and will not appear on schedule or timecard.

-
- Cancel: Can be used to cancel an already approved time off request or a request that is inaccurate.
- If already posted to the timecard or schedule, cancelling will remove it from the schedule but to remove from the timecard, delete the row.
- Employee and Supervisor can cancel a request.

- Cancel: Can be used to cancel an already approved time off request or a request that is inaccurate.
-
- Partial Approval: Some days of the request have been approved while others were denied.
- With this the employee must approve the updated request for it to populate.
- Partial Approval: Some days of the request have been approved while others were denied.

Comparing Other Employees Non-Worked Schedules
- Great tool to determine if other employee(s) have the same day off.
- Other works if the other request has been approved for that day.
1. On the Time Off Requests screen > click the Boat () Icon.

2. Provides an overview of employees that would share the same day off.

Reviewing the Annual Summary
1. On the Dashboard of ADP Time & Attendance, select My Team, Employee, Annual Summary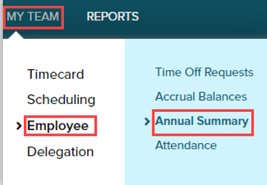
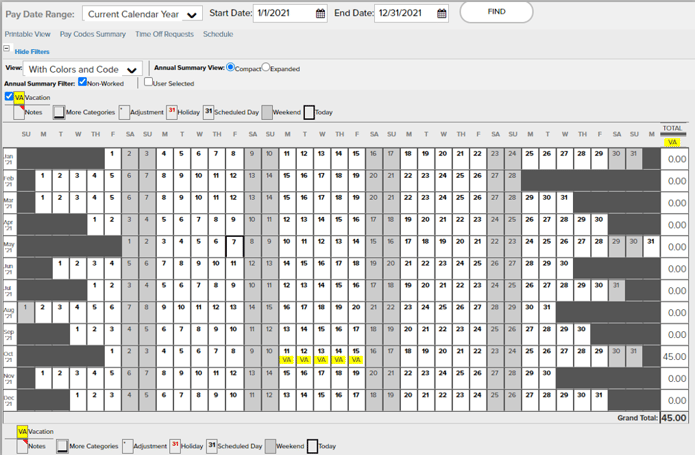
- No data showing. Ensure that the Pay Date Range is accurate, hit Find.

- Your company may have different filters that can be applied. Click on the filter you wish to view.

- Only two pay codes can show totals in the annual summary report.

- Hovering Over the highlighted fields will provide additional information.
Receiving Time Off Request Notifications
- There are two options to receive Time Off Request Notifications, Email & Message Center.
1. Message Center: Click the envelope ()icon at the top right.
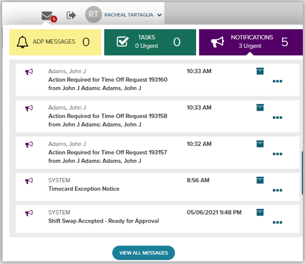
2. Click the three dots to view more details on the notification.

Approving a Shift Swap
1. Log onto myaccess.adp.com and navigate to Go to ADP Time & Attendance. Alternatively log into https://time.adp.com
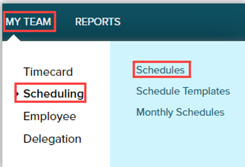
2. Navigate to My Team> Schedules > My Schedule

Supervisors can either Approve or Reject the shift swap
Supervisors are only able to see shift swaps associated by employees assigned directly to the supervisor.

Note: A small banner appears showing a successful approved shift swap request.


