Time & Attendance Support Center
Administration
Employee Management


3. Once supplemental pay code amounts have been entered, click on Save.

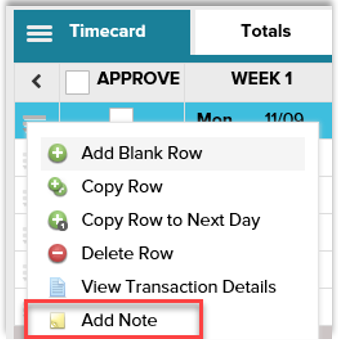
Adding, Copying Rows and Deleting Rows
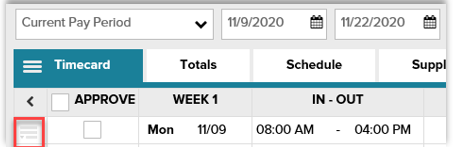
To add a row to that date, click Add Blank Row.
To add an identical row, click Copy Row.
To copy a row to the next day, click Copy Row to Next Day.
To Delete a row, click Delete Row.
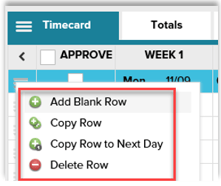
4. Once the row is completed, click Save.
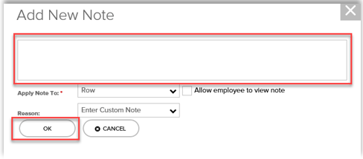
Adding Notes
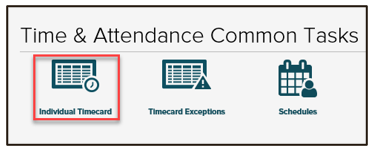
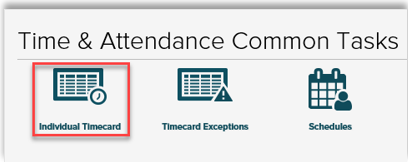
1. From the ADP Time & Attendance Common Tasks, click the Individual Timecard. 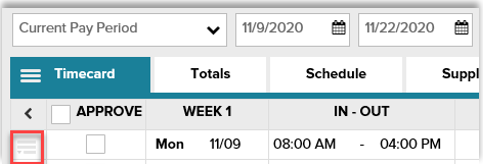
4. In the blank field, type the note. Once completed, click OK.

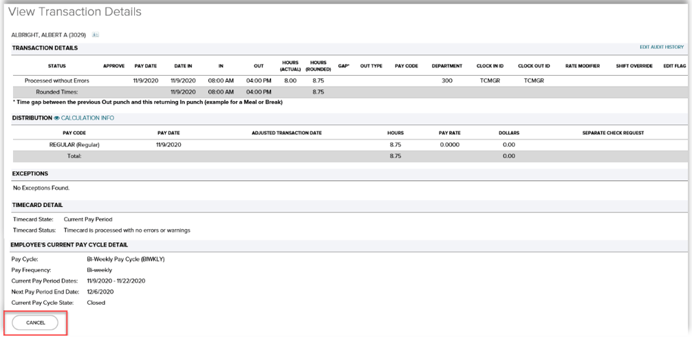
Viewing Transaction Details
1. From the ADP Time & Attendance Common Tasks, click the Individual Timecard.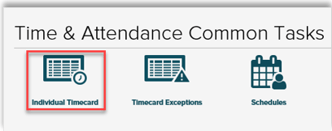


4. To close the View Transaction Details page, click Cancel.
Unlock Timecards
1. From the ADP Time & Attendance Common Tasks, click the Individual Timecard.
 ) sign.
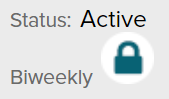 Locked
 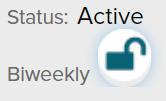 Unlocked
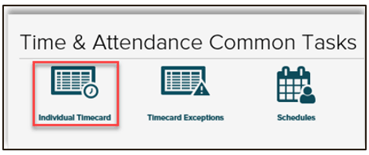


Adding a New Employee in ADP Time & Attendance
- Complete all new hire steps within RUN Powered by ADP® prior to selecting the employees time settings.
Note: To begin adding new employees into RUN, select People from the left navigation bar. Select Add New employee (W-2) or New Contractor (1099).

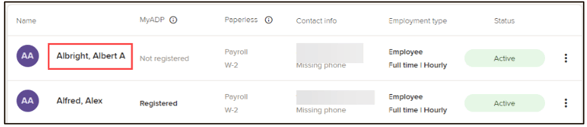
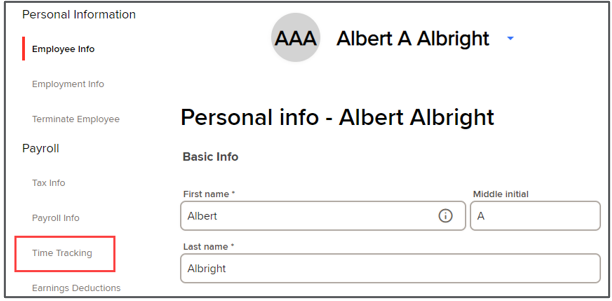
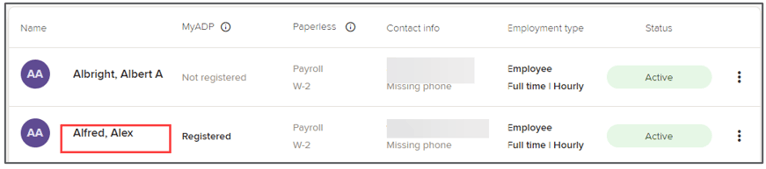
- Upon completion, select the employee from the People Directory.
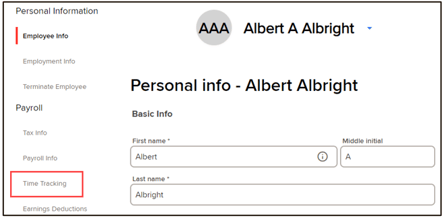
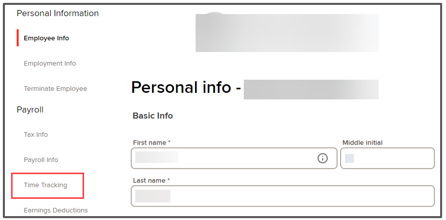
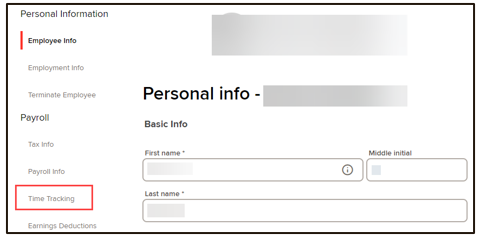
- Navigate to Time Tracking under the employee’s profile.
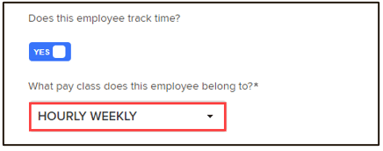
- To add a timecard to an employee, select Yes for “Does this employee track time?”
This is the default setting for all Hourly employees.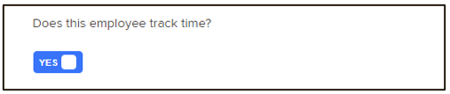
- Assign the appropriate pay class for each employee by selecting the drop-down box for “What pay class does this employee belong to?”
This field is automatically populated with the pay class, depending on the pay frequency you selected.
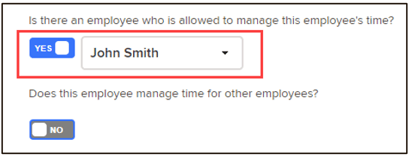
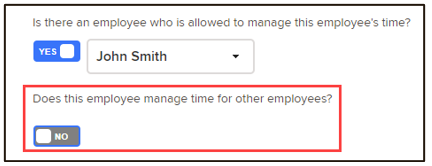
- In the Is there an employee who can manage this employee’s time field, select Yes or No.
This field defaults to No and will not appear if you do not have at least one employee set up as a supervisor.
If Yes, select the supervisor’s name from the list.
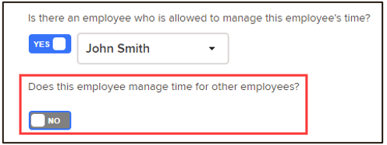
- In the Does this employee manage time for other employees’ field, select Yes if this employee should manage another employee’s timecard.
- In the Do you want this employee’s time to be used in payroll field, select Yes if you wish to pay your employees based on the hours recorded in their timecard.
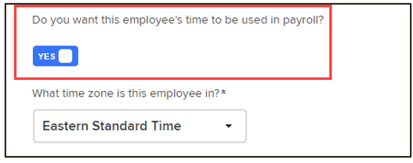
- In the What time zone is this employee in field, select the time zone.

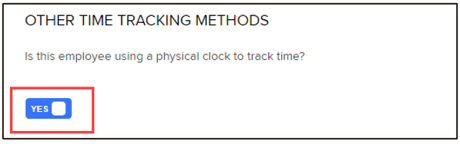
- The Other Time Tracking Methods section is used for managing employees who will use a physical timeclock. Select Yes to populate the Badge Number field.
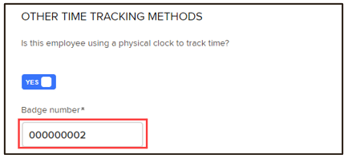
- The Badge Number field will automatically populate with a 9-digit badge number.
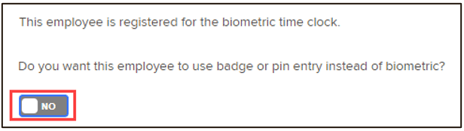
- Need an employee to use a physical badge or enter a pin instead of biometric? Select Yes.
- The badge number field should be updated to match the number on the physical.
- Don’t forget to send the Employee Data Download to update the clock with this request.
- Using Mobile and need to restrict clock in locations? In the Is this employee limited from using mobile time tracking to specific locations field, select the locations this employee can access ADP Time & Attendance from.
- Not seeing a location. Access Time and Attendance to visit the mobile geo locations section under Setup and Location Settings.

- Unable to change location options? Access Time and Attendance to visit the mobile access locations section under Setup and Location Settings. Any location added to the geographical locations list is automatically assigned to all employees.

Assigning a New Supervisor
- In RUN Powered by ADP®, from the People
 icon in the left navigation, select the employee from your people directory.
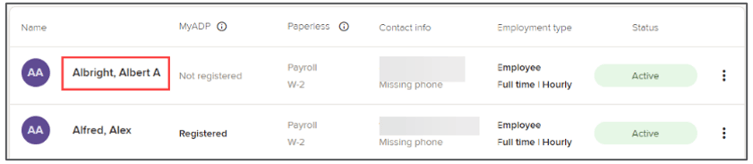
- Select Time Tracking.
- In the Does this employee manage time for other employees’ field, click the toggle to change it to Yes.
- Click Save.
Assigning a Supervisor to an Employee
- In RUN Powered by ADP®, from the People icon in the left navigation, select the employee from your people directory.
- Select Time Tracking.
- In the Is there an employee who is allowed to manage this employee’s time field, click the toggle to change it to Yes. Select the supervisor from the drop-down.

- Click Save.
Adding a Practitioner
- On the RUN Home Page, click on the Settings icon in the left navigation bar.

- Navigate to Manage user access.

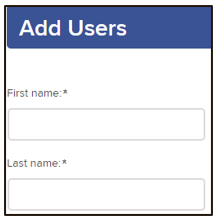
- Click on Add User.

- On the Add Users page, enter First and Last name of the new practitioner.
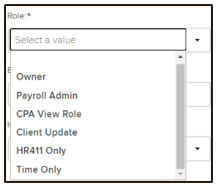
- Choose the appropriate role for the new practitioner.
- Owner: Has access to all areas of RUN Payroll including payroll, people directory, and Timecard access.
- Payroll Admin: Has access to payroll and timecards
- Time Only: Has access to timecards only
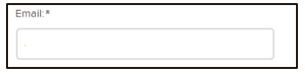
- Enter Email for Practitioner
- Must be a unique email address. Cannot be used by another profile on this company or company group.
8. Select Save
- The new practitioner will receive an email with a link to begin registration.
Terminating Employees, Supervisors & Practitioners
- Log onto runpayroll.adp.com
- Click Settings
 , and then click on Manage user access.
- Click the Role of the practitioner you want to terminate.

Click Remove User.

Terminating a supervisor
- To see which employees are assigned to which supervisor, print the Supervisor Assigned Employee List Report in ADP Time & Attendance.
- In RUN Powered by ADP®, select the People
 icon.
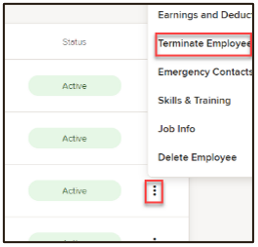
icon. - From the Action Icon on the row of the employee you want to terminate, select Terminate Employee.
- On the Terminate page, complete the following:
- In the Termination Date field, enter the employee’s termination date. (This date should be no earlier than the last day of the current pay period)
- In the Last Day Worked field, enter the last date that the employee worked.
- In the Termination Reason field, select the termination reason.
- In the Termination description field, select the description that best matches the reason.
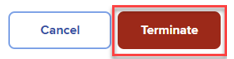
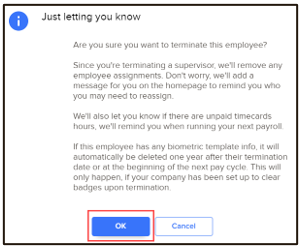
- Click Terminate.
- Click Terminate Employee.

Terminating an Employee
- In RUN Powered by ADP®, select the People icon.
- From the Action Icon on the row of the employee you want to terminate, select Terminate Employee.
- On the Terminate page, complete the following:
- In the Termination Date field, enter the employee’s termination date. (This date should be no earlier than the last day of the current pay period)
- In the Last Day Worked field, enter the last date that the employee worked.
- In the Termination Reason field, select the termination reason.
- In the Termination description field, select the description that best matches the reason.
- Click Terminate.
- Select how they will be paid their final check.
Approve a Shift Swap Request (Supervisor)
Starting Point: My Team > Scheduling > Schedules.
1. A yellow notification banner appears at the top of the Schedules page as well as a Pending Approval
indicator on the employee shifts.
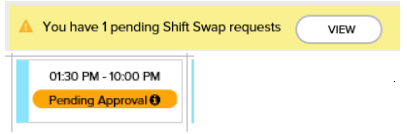
2. From the banner, click View. The Shift Swap Request Details page appears. Enter comments and
click Approve.
a. To reject the request, click Reject
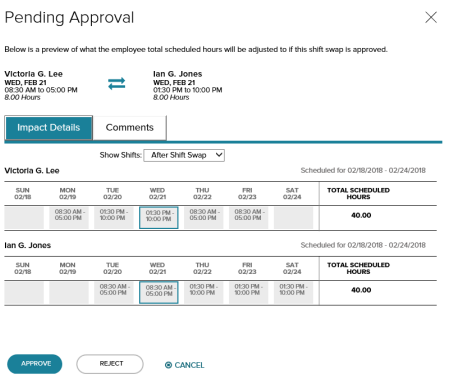
b. If desired, before approving or rejecting the swap request, click View the impact of
approving this swap request.

3. A preview of what the employee total scheduled hours will look like after the swap is provided. Click
Approve.
a. Or, Click Cancel to return to the Shift Swap Request Details page and Approve.
4. From the Shift Swap Request Details page, the Supervisor can click Back to return to the
Schedules main page.
5. Once a shift swap request is approved, the shifts will be swapped on the Schedule and no longer
show any shift swap indicators.
Feature Management
Managing Holidays In Time & Attendance
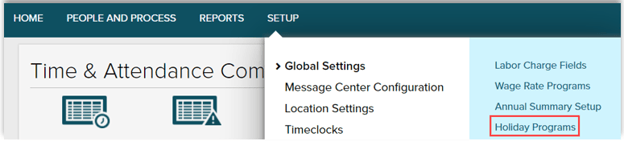
- Log into runpayroll.adp.com, select Time from the left navigation menu.
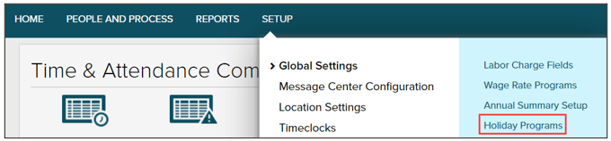
- Select Setup > Global Settings > Holiday Programs
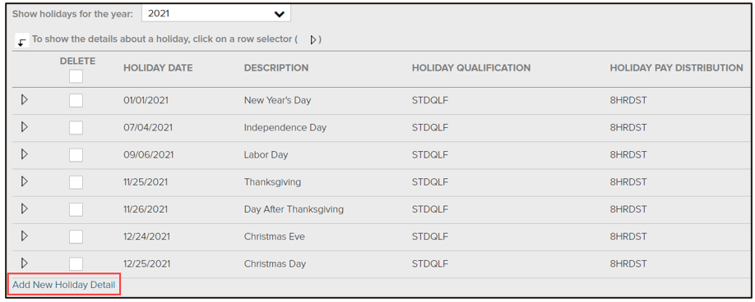
- Click the Holiday Program to edit.

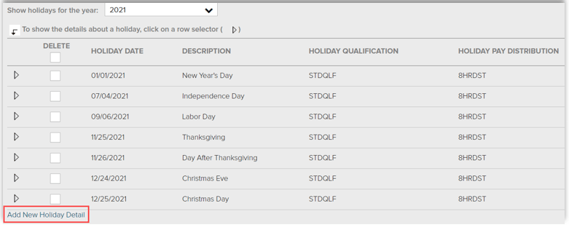
- To add a new holiday, click Add New Holiday Detail.
To edit a holiday, click the row selector icon (![]() ).
).
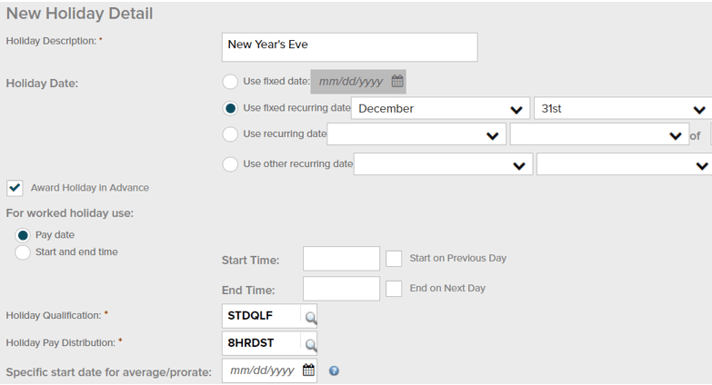
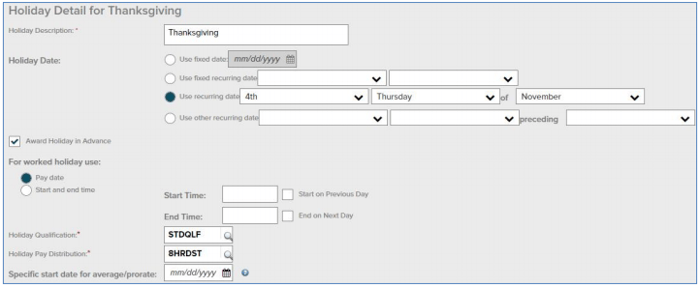
- Complete the following fields:
-Holiday Description: Type the holiday name.
-Holiday Date: Click to select and complete one of the following:
-Use Fixed Date: Select this option for holidays on a single date in the year selected
-Use Fixed Recurring Date: Select this option for holidays on the same date each year
-Use Recurring Date: Select this option for holidays on a specific day of a specific week during a specific month
-Use Other Recurring Date: Select this option for holidays on a specific day relative to a specific date
-Award Holiday in Advance: Click to select this check box unless your policy qualifies holiday awards prior to holiday awards (for example, employees must work the day before a holiday to receive holiday pay).
-Pay Date: Select this option.
-Holiday Qualification: Type STDQLF (Standard Qualifications).
-Holiday Pay Distribution: Type 8HRDST (8 hrs./day), unless your employees should be paid a different number of hours for the holiday.
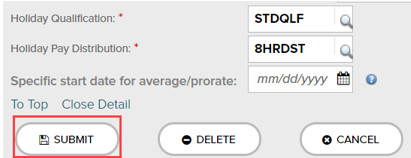
- Click Submit.
2. Select Setup > Global Settings > Holiday Programs
3. Click the Holiday Program to edit.

4. To add a new holiday, click Add New Holiday Detail. To edit a holiday, click the row selector icon (![]() ).
).
5. Complete the following fields:
- Use Fixed Date: Select this option for holidays on a single date in the year selected
- Use Fixed Recurring Date: Select this option for holidays on the same date each year
- Use Recurring Date: Select this option for holidays on a specific day of a specific week during a specific month
- Use Other Recurring Date: Select this option for holidays on a specific day relative to a specific date
6. Click Submit

Add Departments in ADP RUN
1. Log onto runpayroll.adp.com
2. Select Settings (![]() ) from the left navigation bar, and choose Departments
) from the left navigation bar, and choose Departments
3. On the Departments Info screen, select Add
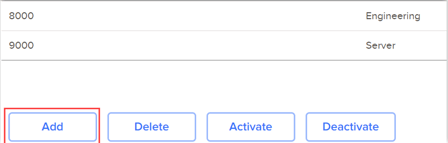
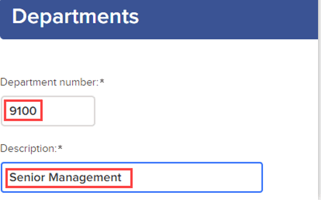
4. On the Departments screen, enter a number (up to 6 digits), enter a description, select Save.
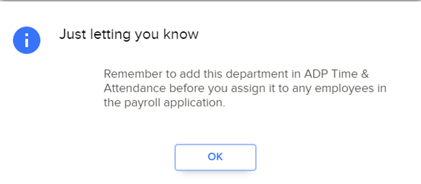
5. A pop-up window will remind you that once you enter a department in RUN you must also add it to ADP Time & Attendance, select OK to close.
Additional Department Information:
-
- Recommend keeping all departments the same number of digits
- Don’t forget that if a department is entered in RUN, it must be added to ADP Time & Attendance to avoid errors on payroll
- You can add departments into ADP Time & Attendance without adding them to RUN. They will be for reporting purposes only within ADP Time & Attendance
- The hours will transfer to payroll even without departments added to RUN
- RUN allows a total of 5 departments to be assigned to each employee with a different rate of pay. You can add these through the People icon
 on the left navigation and navigating to Payroll Info.
 from the left navigation bar
TLM Administrator: Log onto https://time.adp.com
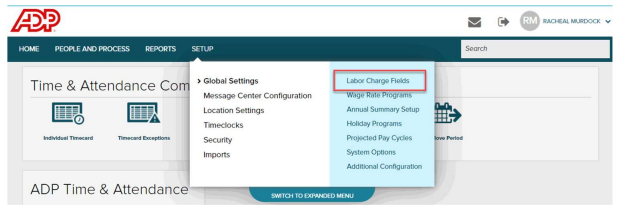
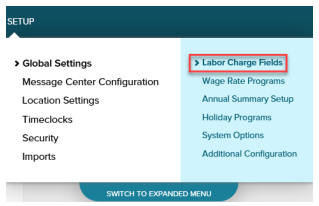
2. Navigate to Global Settings under the Setup menu, Select Labor Charge Fields.
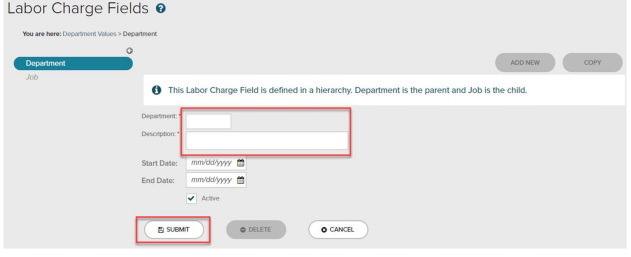
3. Select Labor Charge Field type that needs to be added, Select Add New.
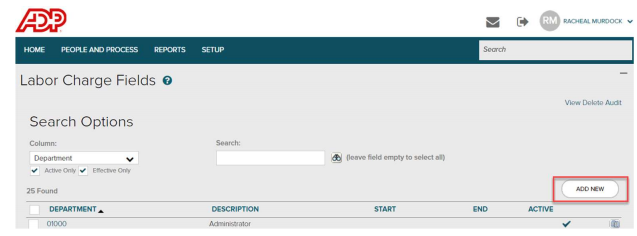
4. Enter Department and Description. (Recommend using a number for the Department), select
Submit to add department.
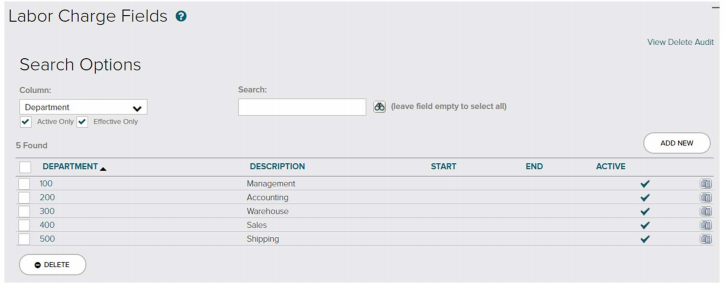
5. All new departments added will be listed under the selected Labor Charge Field.
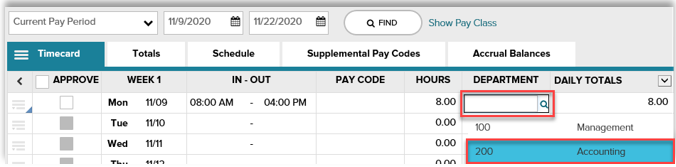
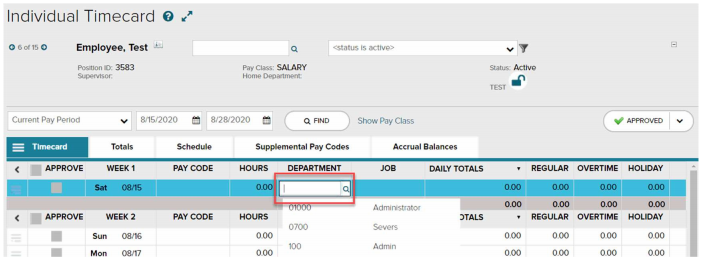
5. Once the Departments and Jobs are added, when you navigate to the individual timecards you will
see Department and Jobs listed as separate columns.
Add Jobs in Labor Charge Fields
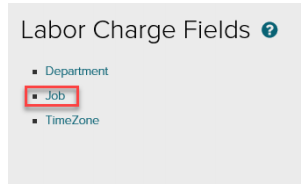
1.Go to Setup > Global Settings > Labor Charge Fields.
2. Click Job.
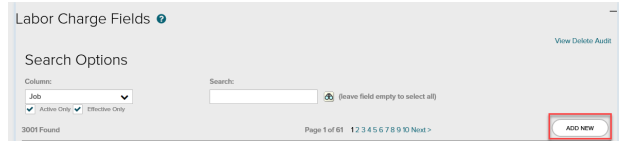
3. Click Add New.
4. In the Job field enter the number of the job (recommended to use numbers for departments when the account is RUN-integrated)
5. In the Description field enter the name of the job.
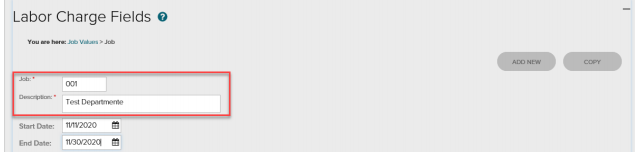
6. If the job is time limited, you can also enter a Start and End date at this time as well

7. If the Job is to have a separate rate of pay from the standard you can enter the start date for
altered rate calculations as well as the rate of pay here.
-Time and Attendance does not backdate rate adjustments so the earliest the rate of pay would apply would be the beginning of the current pay period.
-None of the rate information stored in Time and Attendance will transfer over to payroll and is for reporting purposes only.
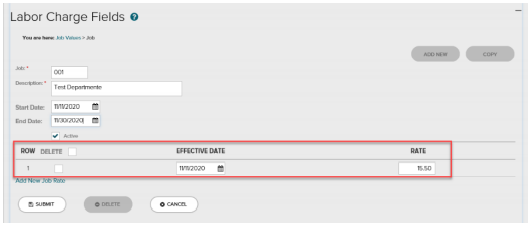
8. Once all applicable fields are filled click Submit.
Deactivate Jobs in Labor Charge Fields
- From the Job uncheck Active or add an End date.
-Once used in timecards Jobs can only be deactivated but not removed due to historical data attached to the job.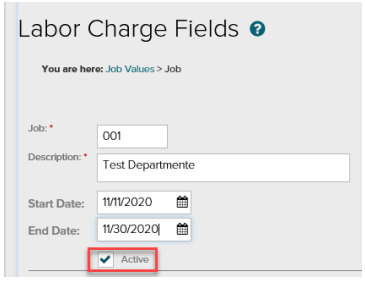
Objective
-Adding specific Geographical locations to Time and Attendance-Assigning Geo locations either globally or on a per employee Basis
-Deactivating unused Geo locations
RUN Practitioners: Log into runpayroll.adp.com and click on Time  from the left navigation bar
TLM Practitioners: Log into Time and Attendance through https://time.adp.com.
Geo Location Setup:
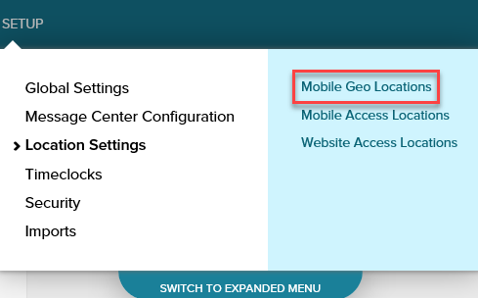
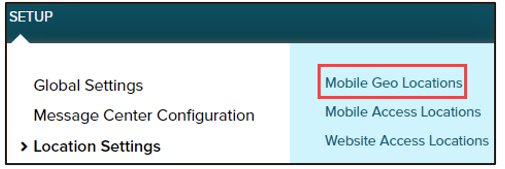
- Select Setup > Location Settings >Mobile Geo Locations.
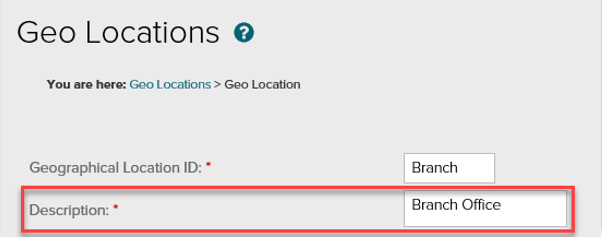
- Click Add New.
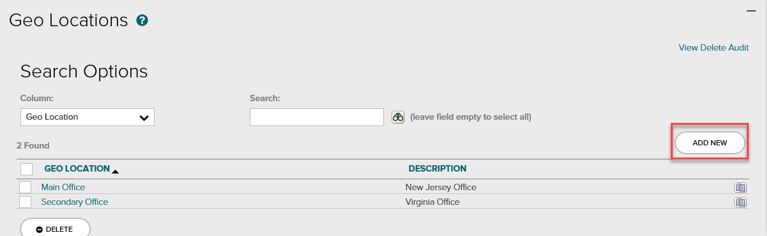
- Enter the Location ID. (this is what shows when you look at reports, should be kept short).
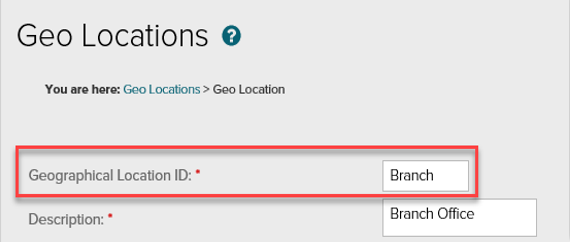
- Enter the Description. (you can be more verbose here I.E addresses or Austin Office)
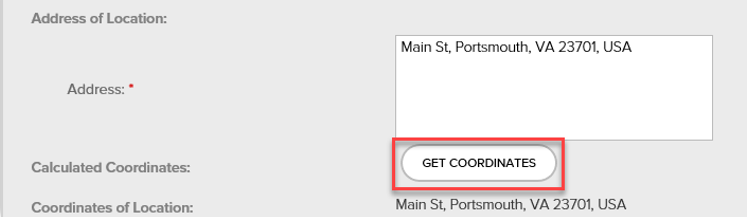
- Enter the Address.
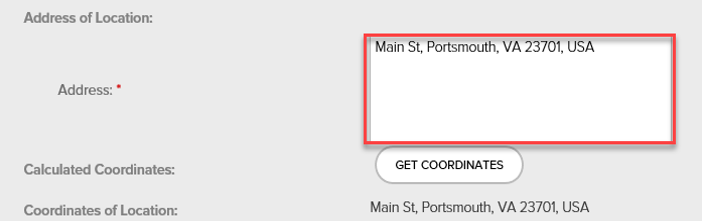
- Once the Address has been entered click Get Coordinates.
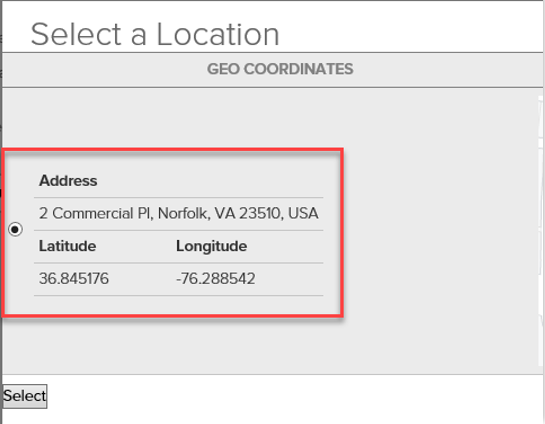
- If the search results in multiple locations appearing, please select the location that matches your address the closest.
- Under the Range entry and select the “Type” dropdown, from there select if you want to Geo Fence to be measured in Meters or Miles.
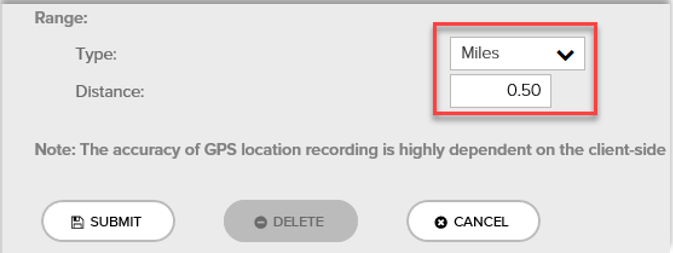
- Then enter how large you want the fence in distance. (This is how far away from the actual location is valid for the mobile application, ADP recommends a minimum of a ½ mile due to differences in phone manufacture.)
Global Geo Location Activation:
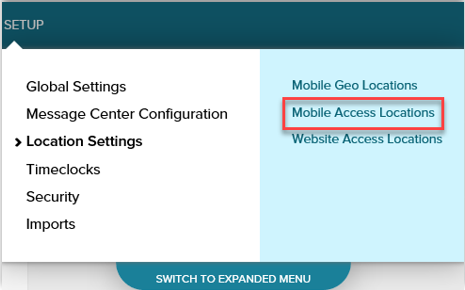
- Select Setup > Location Settings > Mobile Access Locations.
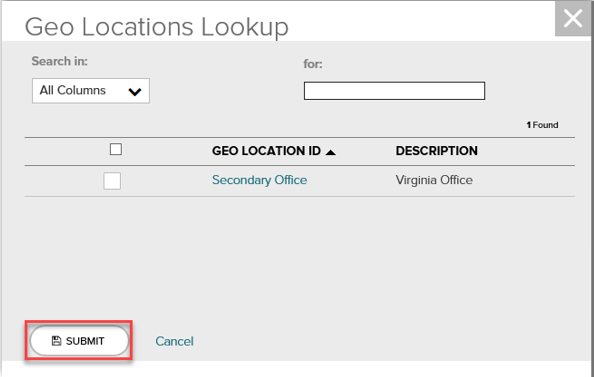
- To add a Geographical Location, click the plus
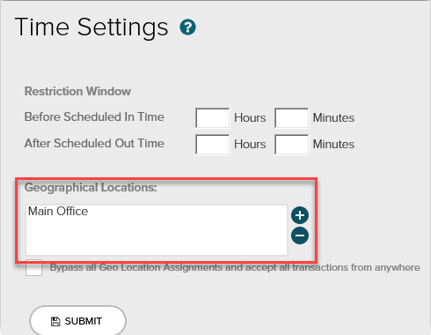
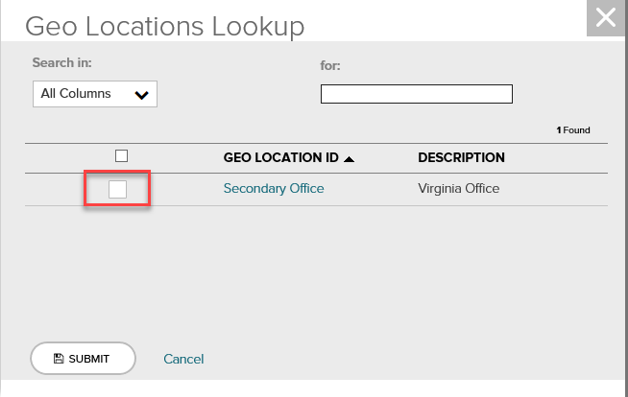
- In the dialogue box that appears click the checkbox next to each location you wish to add.
- To remove a Geographical Location, click the minus icon, in the dialogue box that appears click the checkbox next to each location you wish to remove.
- When you are finished click Submit to confirm your selection(s).
Employee Geo Location Activation:
- From the RUN home page select People
 from the left navigation bar.
2. Navigate to the employee and select Time Tracking
3. Turn “is this employee limited from using mobile time tracking to specific locations?’ back to no.
-Employees will be able to clock in from all locations with no limitations

4. To permanently delete a geo restriction, the location must be removed from all active, inactive, and terminated employees. Use the Filter option in the People Directory of RUN to view all Status types
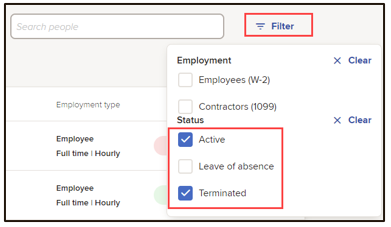
5. Once the Status is selected, navigate to Time Tracking, and review the mobile locations
-Uncheck the geo location from all employees whether Active or Terminated.
6. Once the location is removed from all employees, it can be removed from Time and Attendance. Navigate to Setup, Location Settings, and select mobile geo locations.
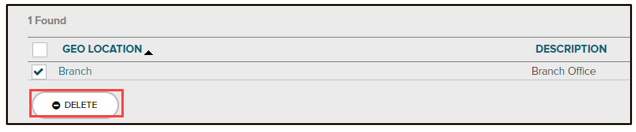
7. Place a check to select the location to delete.
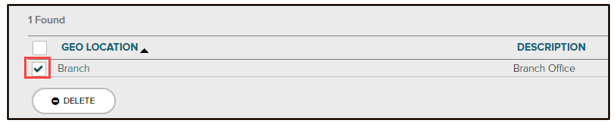
8. Select Delete to finalize.
Need to turn off mobile clocking? Reach out to our support team for assistance.
Finding your public IP address:
1) From a computer on your network navigate to www.ipchicken.com

2) Record IPv4 address to use in Time and Attendance
Note: This IP address is controlled by your internet service provider. There is a chance
that it can change depending on updates performed by the provider. If access is denied
check back here to see if the IP address has changed.
Alternatively, you can find the public IP address by entering the words “what’s my ip” in
any web browser search.
Adding your public IP address to Time and Attendance:
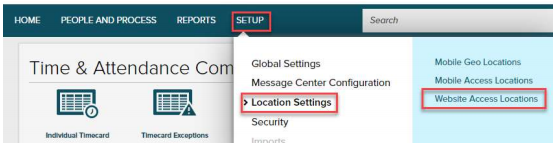
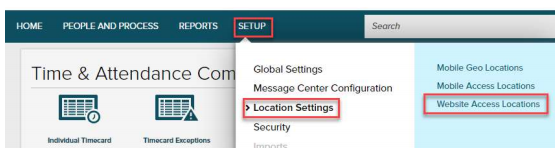
3) From RUN access Time Management > Setup > Location Settings > Website Access Locations
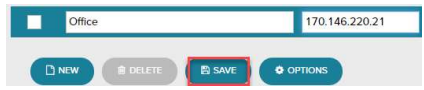
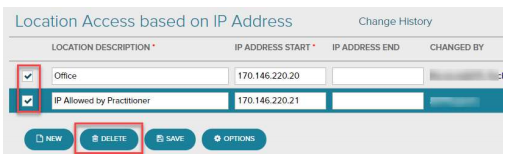
4) Under Location Access based on IP Address:
a. Description: Recommend using the location of the IP Address, i.e. Office
b. IP Address Start: Enter IP address obtained from IP Chicken
c. IP Address End: Remains blank
d. Select Save
Deleting your public IP address to Time and Attendance:
5) From RUN access Time Management > Setup > Location Settings > Website Access Locations
6) Under Location Access based on IP Address:
a. Check the box next to the location you wish to remove
b. Select Delete
Note: Deleting an IP address will remove their ability to log in from that network.
Removing all IP addresses will allow employees to clock in and out from any location.
Allow access from Employees:
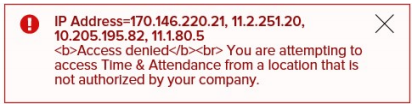
At times an employee will receive an error message when attempting to clock in and out. Our
system will record attempts made within the last 24 hours to make it easier for Administrators
to add their IP address.
Error Message: “You are attempting to access Time & Attendance from a location that is not
authorized by your company”.
7) From RUN access Time Management > Setup > Location Settings > Website Access Locations
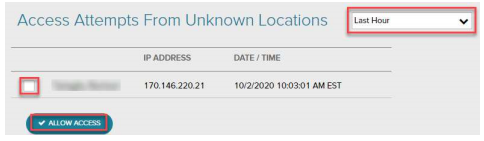
8) Under Access Attempts from Unknown Locations
a. Choose the time frame of the attempt from the drop box (Max is 24 hours)
b. Check the box next to the employee’s name
c. Select Allow Access
Reports
Choosing a Custom Date Range
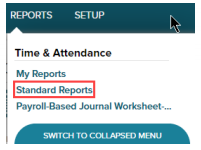
1. Locate the report you would like to pull under Reports > Standard Reports.
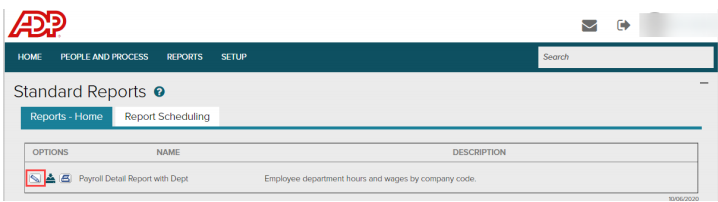
2. Click the pencil icon to edit the report.
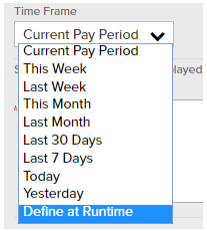
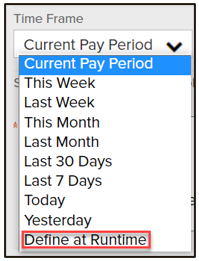
3. From Edit Report, find the Time Frame section to choose from the drop-down.
4. If you want to enter your own date range, select Define at Runtime.
5. Make any other selections desired before clicking Preview. A new tab will open with fields
available for you to enter the desired date range.
Filtering Reports
6. Locate the report you would like to pull under Reports > Standard Reports.
7. Click the pencil icon  to edit the report.
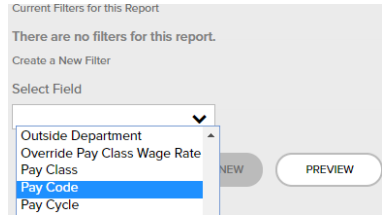
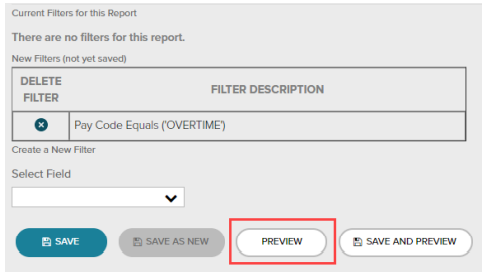
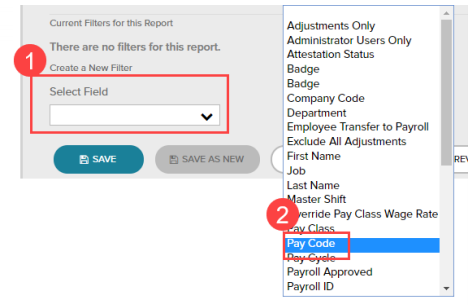
8. From Edit Report, scroll to the bottom of the page to find the Current Filters for this Report
section. In the drop-down, select the field you wish to filter for. In this example, we are filtering
by Pay Code.
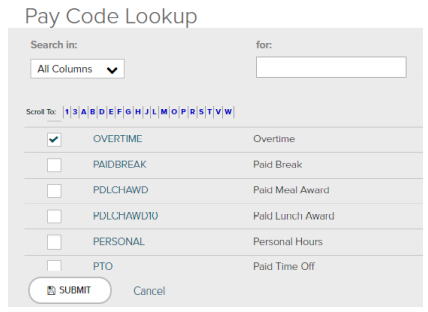
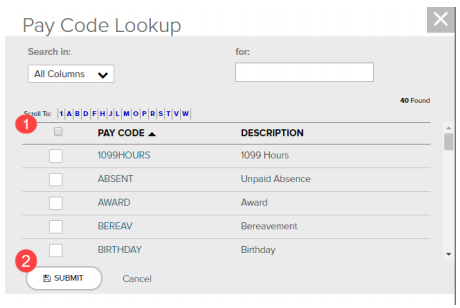
9. Once your selection is made, you will be able to click the plus sign  to choose from available
pay codes to filter by. Check the box next to the pay code desired and click Submit. In this
example, we are filtering by the Overtime pay code.
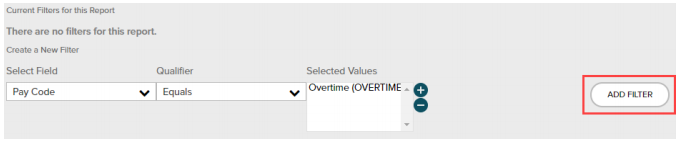
10. Click Add Filter on the right to finalize your filter.
11. Click Preview to pull the report with this filter. If you will pull this report often, you can also
rename the report up at the top to select Save as New at the bottom. Saving as new will place
the custom report into Reports > My Reports.
Including Terminated Employees in Reporting
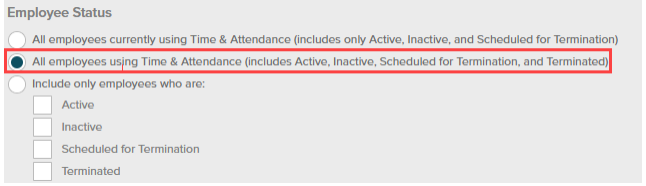
1. From the Edit Report screen, locate the Employee Status section.
2. Choose All employees using Time & Attendance (includes Active, Inactive, Scheduled for
Termination, and Terminated).
Note: If the report fails to open in a new tab, please ensure your browsers Pop-up Blocker is turned
off.
Navigate to Reports > Standard Reports.
Click the edit pencil for the report you wish to use.
All reports will display the current pay period by default. On the Edit report screen, click the
Time Frame dropdown. Select “Define at Runtime”.
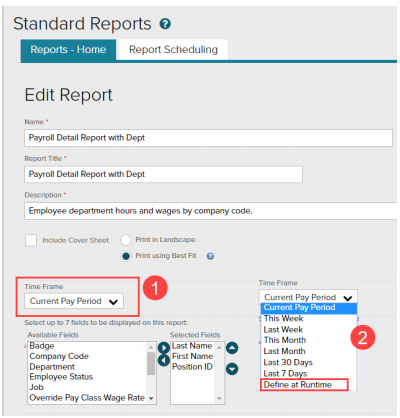
Under the select field drop-down menu, pick the Pay Code.
Optional: In the Employee Status section, select All Employees using Time & Attendance
(includes Active, Inactive, Scheduled for Termination, and Terminated).
This is to ensure that all employee information is included in the report.

Click the plus button next to the Selected Values box.

In the Pay Code Lookup box, type or select the name of the code you are looking for, then check
the box and click Submit.
Click on Add Filter.

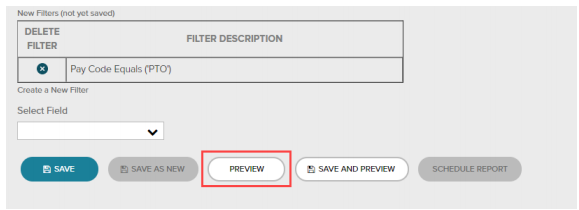
Scroll down to the bottom and click on Preview.
The report will populate in a new tab.
Note: you can also re-name the report and click Save and Preview in the final step, and the
report will save to the My Reports section so it can be run again later with the same parameters.
View and Download Timecard Reports
RUN Practitioners: Log into runpayroll.adp.com and click on Time  from the left navigation bar
TLM Practitioners: Log into Time and Attendance through https://time.adp.com
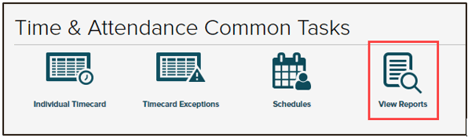
- From Time and Attendance Common Tasks select View Reports.
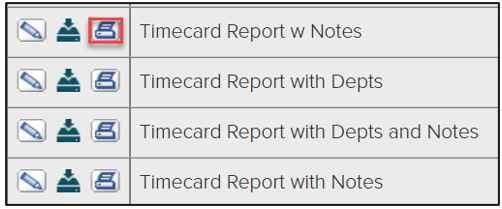
- To run and view the timecard report for the current pay period, select printer icon (
 ). The report will open in a new tab of your web browser.
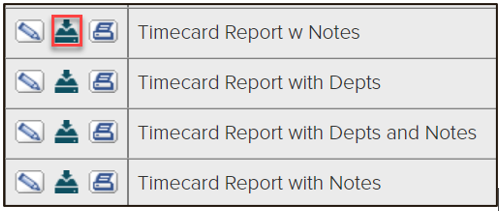
-From your browser you can download or print the report.- To run and download the timecard report in csv/excel format, for the current pay period, click on the download icon(
 ).
).
Edit or Filter the Timecard Report
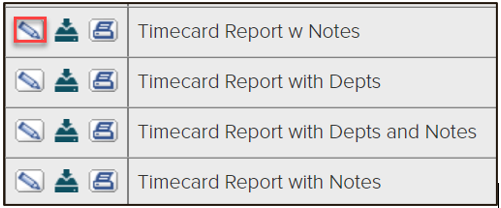
- To edit a report click on the pencil icon (
 ) to begin.
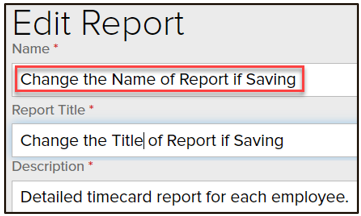
- Update the Name and Report Title of the report to Save to your My Reports.
- From the Time Frame drop-down, select from an established date option or choose Define at Runtime to use custom dates.
- Choose one of the three options available upon completion of making changes to your report. -Save: Overwrites default timecard report options.
-Preview: Allows a view of the report in your web browser without overwriting default timecard report options.
-Save & Preview: Saves the report to your My Reports without overwriting the default timecard report options. Allows a view of your custom report in your web browser.

- If your report’s timeframe was updated to Define at Runtime, a new window will populate allowing you to add the From and To Dates of your report.
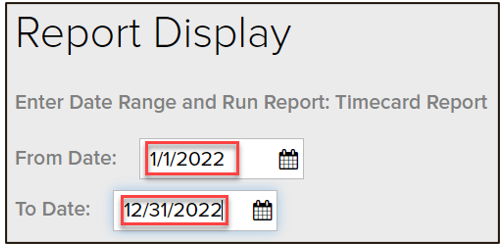
- The report will populate in a new tab of your browser.
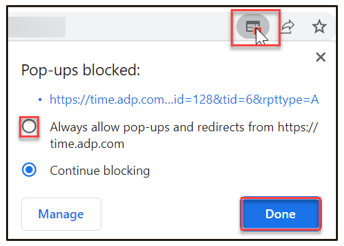
Note: If the report did not populate, check to ensure that your pop-up blocker has been allowed for the Time and Attendance site. A pop-up blocker icon may look slightly different depending on the browser, but all are located within the address bar.
- Navigate to the address bar of your browser.
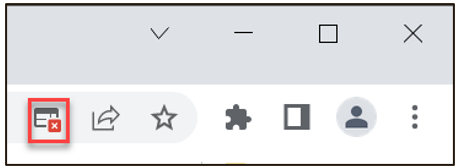
- To allow pop-ups, select the pop-up blocker icon and choose Allow pop-ups. Select Done to finalize.
- Select Preview or Save and Preview to run the report again.
- To run and download the timecard report in csv/excel format, for the current pay period, click on the download icon(